This guide walks through the process of creating a new Space VC template in Innomesh Room Manager.
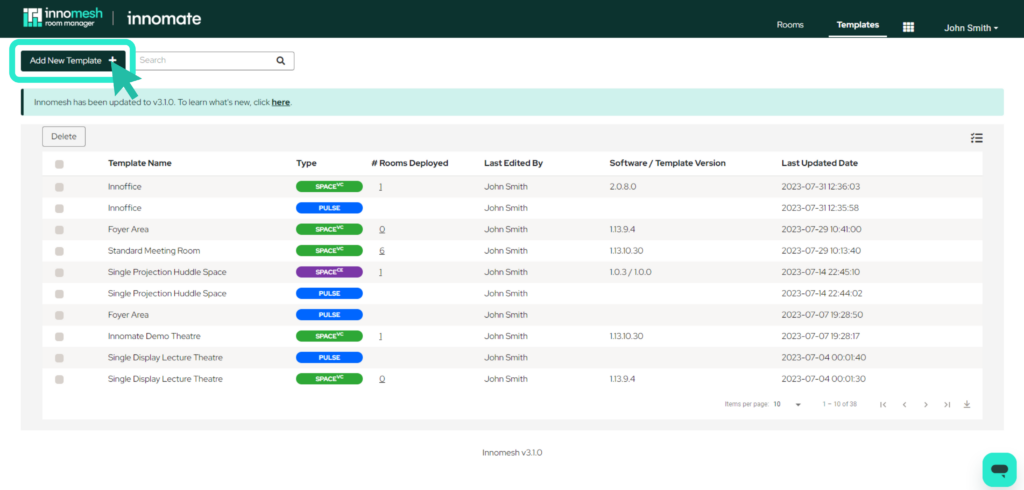
Step 1: Navigate to the Templates Page
Click the Templates button in the top-right corner of the Innomesh interface to open the Templates page.
Step 2: Add a New Template
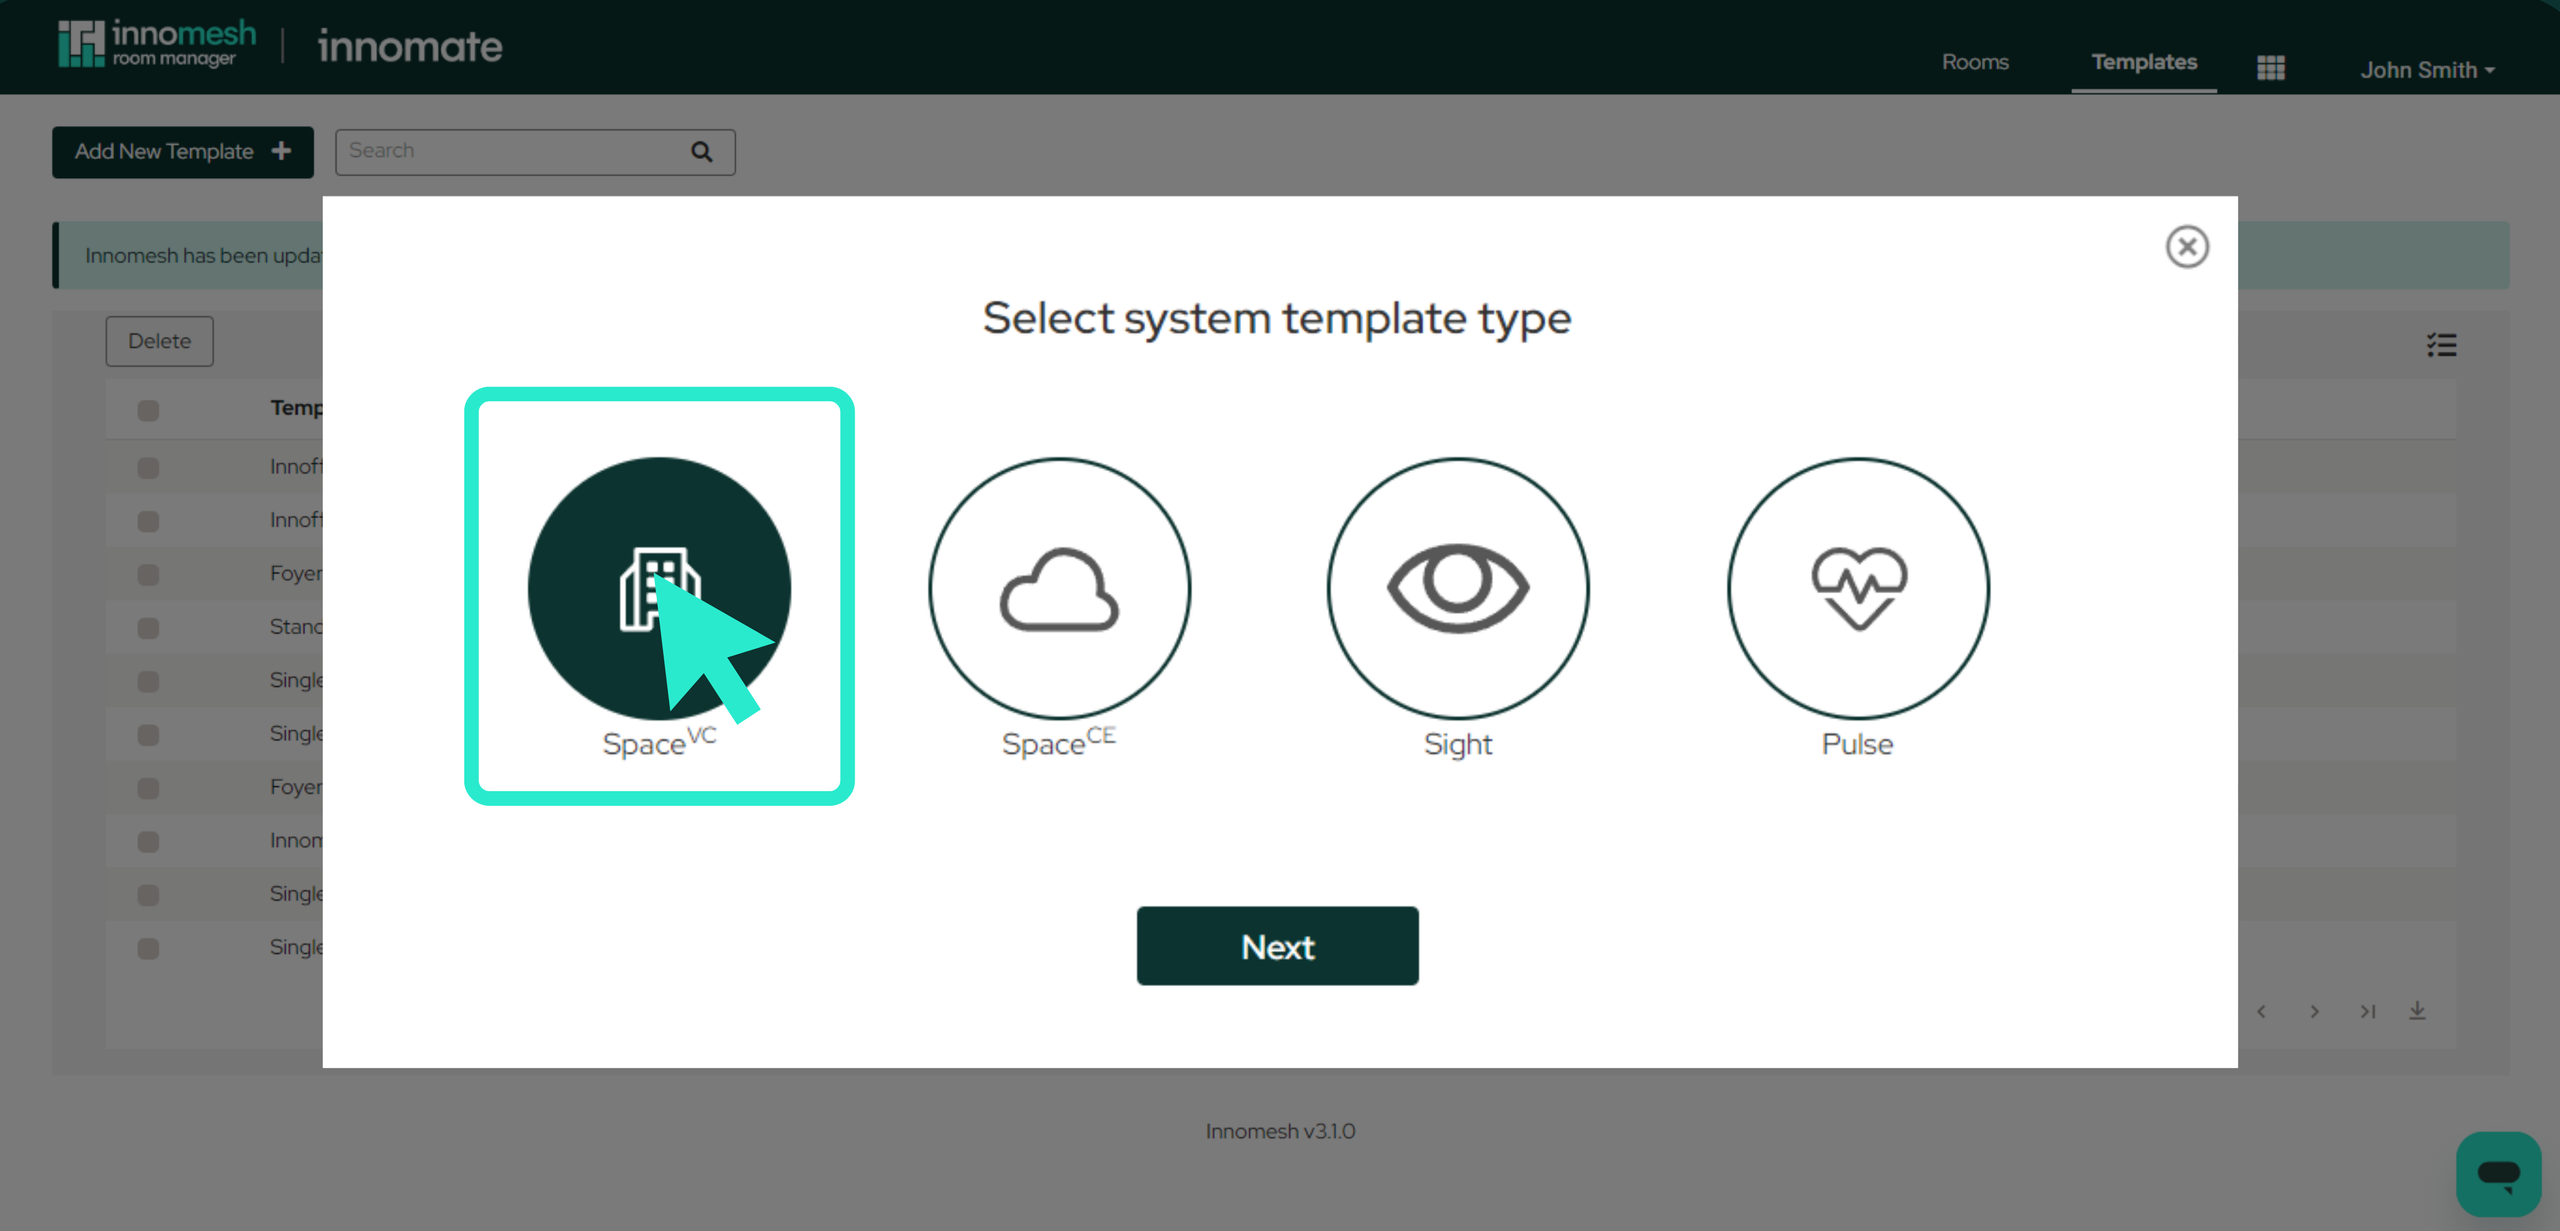
Click the Add New Template button. A popup window will appear prompting you to select a product type. Choose SpaceVC and proceed.
Depending on your tenancy configuration, you may also need to select a software package before continuing.
Step 3: Configure the Template
A blank template window will open with a list of configuration sections on the left-hand side. Select each section and enter the required attributes and values. The available configuration sections for a Space VC template are:
- Properties: Template name, description, version, type, and portability settings.
- Devices: Hardware definitions across six device categories (Native, IP, ComPort, EISC, Gateway, Cresnet).
- System: Core system-level settings.
- User Interfaces: Touch panel and control interface definitions.
- AV Sources: Video and content source configurations.
- Audio Sources: Audio input source configurations.
- Destinations: Display and output endpoint definitions.
- Device Controls: Mappings for device-specific control actions.
- Audio Conference: Audio conferencing bridge settings.
- Recorder: Recording device configurations.
- Environmentals: Lighting, blinds, and other environmental controls.
- Room Link: Settings for linking multiple rooms together.
- Automation: Automated behaviour configurations.
- Administration: Administrative settings and information templates.
- Macros: Custom event-triggered and time-triggered automation scripts.
- Room Options: Defines which configuration items are editable at the room level.
Step 4: Configure Room Options
The Room Options section is where you define which template elements users can manage at the room level. By checking items in this list, you control what contractors and non-administrator users see when deploying rooms. This enforces organisational standards and prevents unauthorised changes to critical configuration items.
Step 5: Create the Template
Once all sections have been configured, click the Create button to finalise and save the template.
Options Menu
After the template has been created, a dropdown Options menu becomes available in the top-right corner of the template editor. This menu provides the following utilities:
- Download as JSON: Export the template configuration as a
.jsonfile for backup or sharing. - Copy Device IDs: Copy device identifiers to the clipboard.
- Update Information Template: Edit or update the information template displayed on touch panels.
- Update XPanels: Refresh XPanel connections with the latest template changes.
- Load Template from File: Import a template configuration from a previously exported
.jsonfile. - Third Party Template: Upload Node.js packages for third-party integrations.
- Duplicate Template: Create a copy of the template with all its settings.
- Delete Template: Permanently remove the template.