Every Space VC system template operates using a specific software version. These versions are updated as new features and bug fixes are implemented. This guide explains how to change the software version on an existing Space VC template.
Step 1: Open the Template
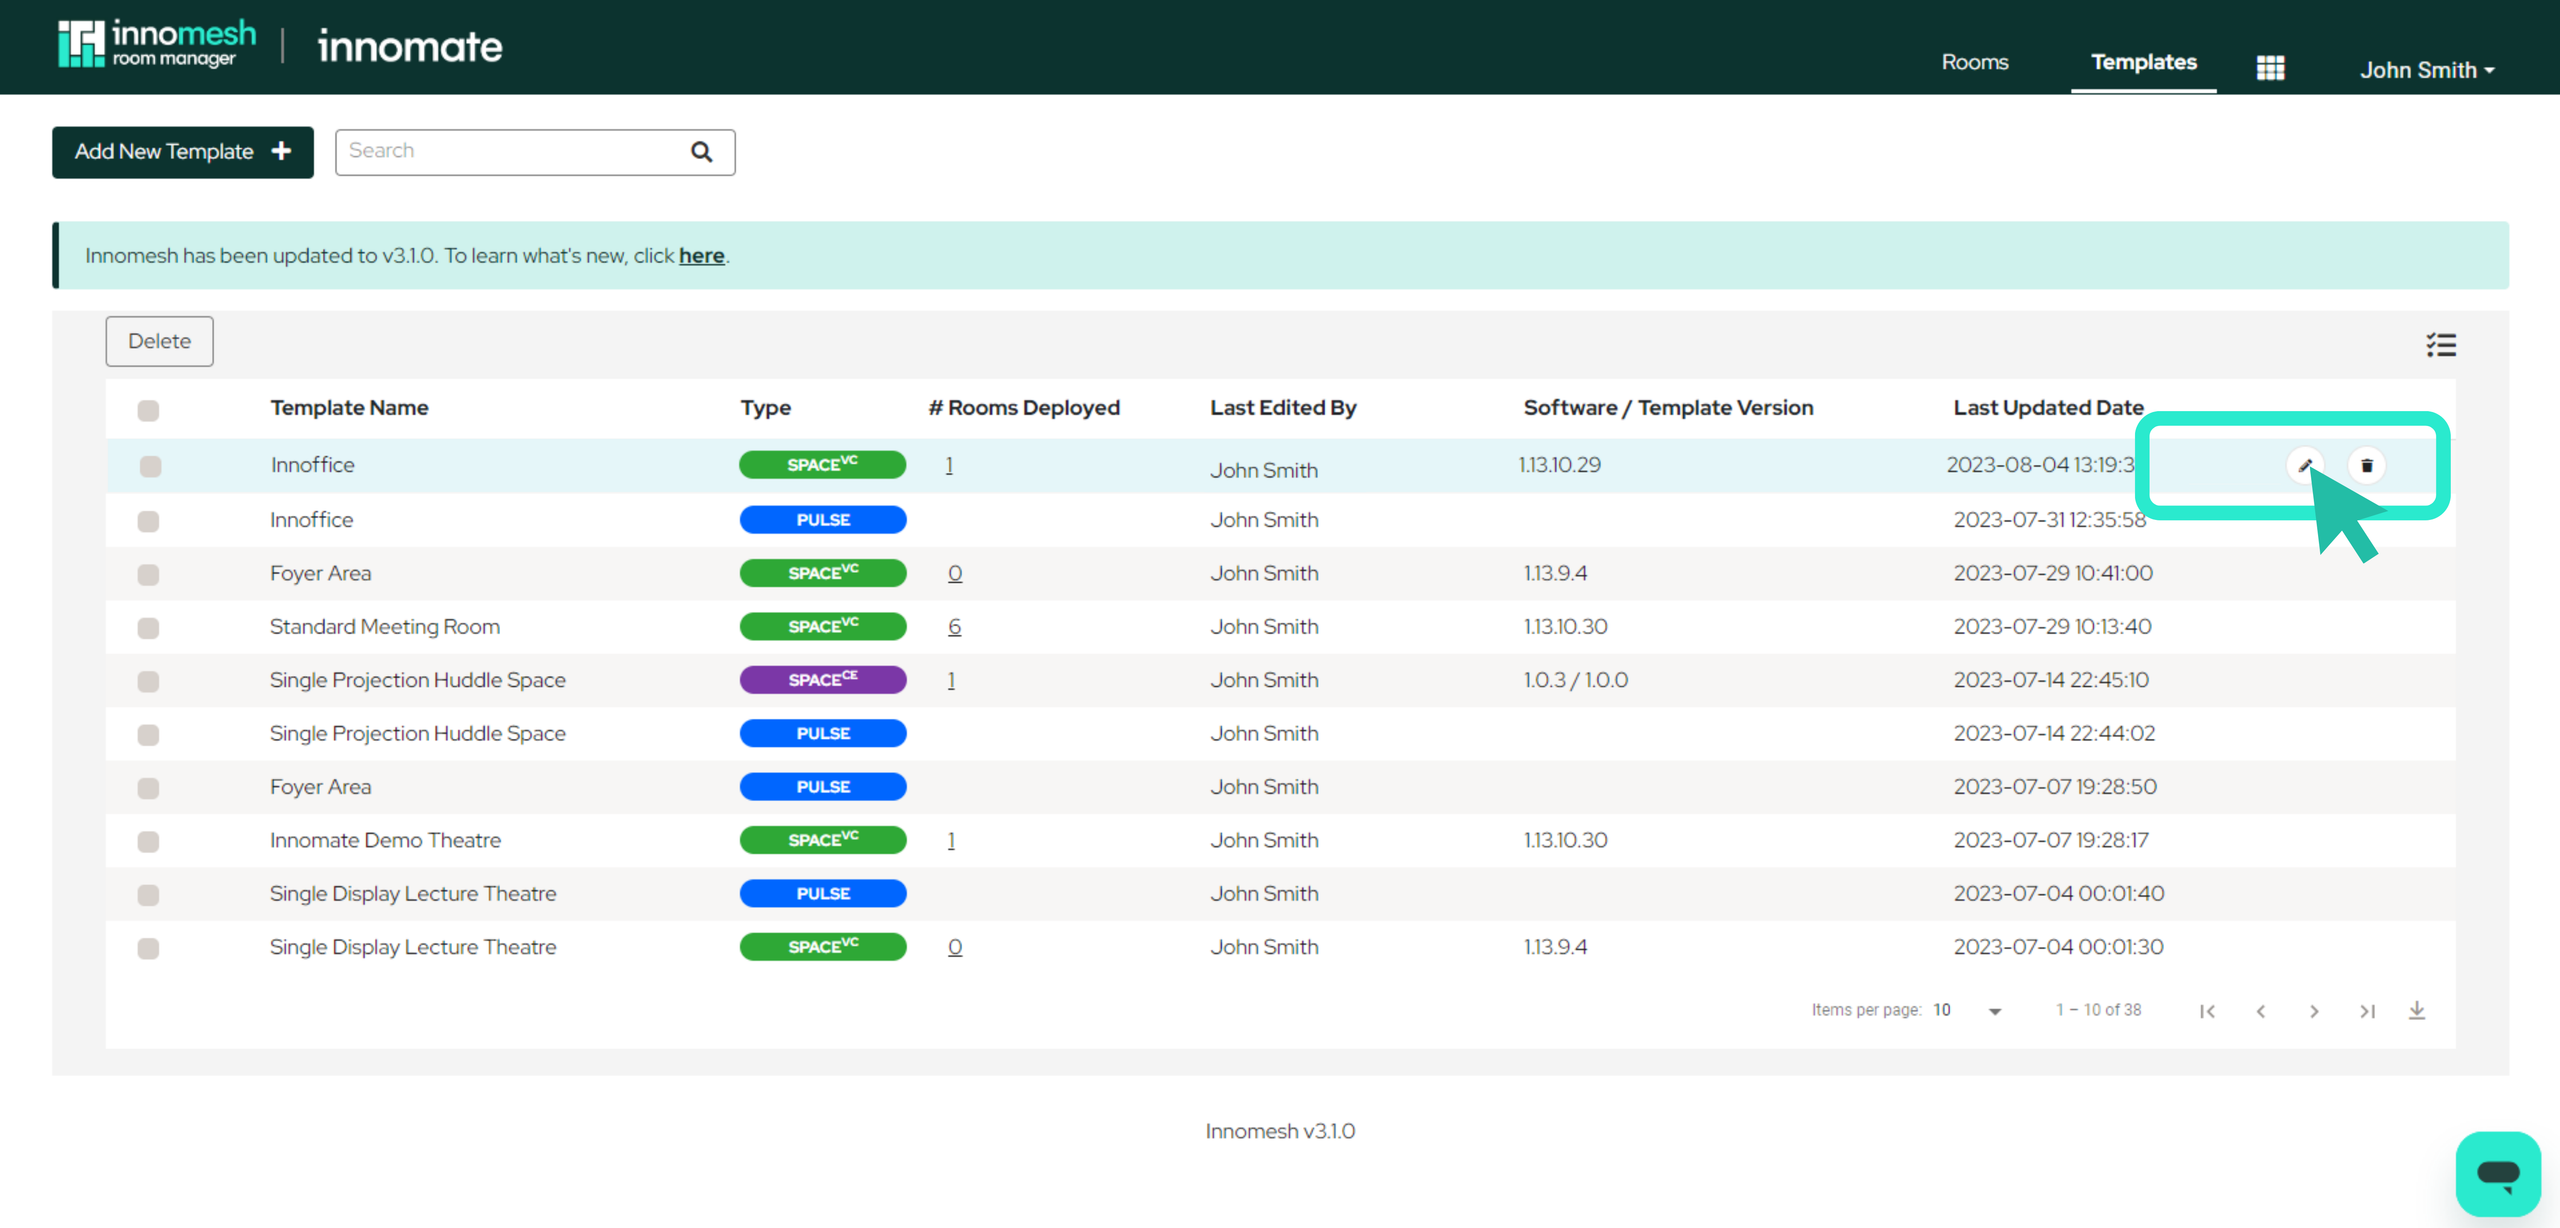
Navigate to the Templates page, hover over the template you wish to update, and click the pencil icon to open the template editor.
Step 2: Locate the Software Version
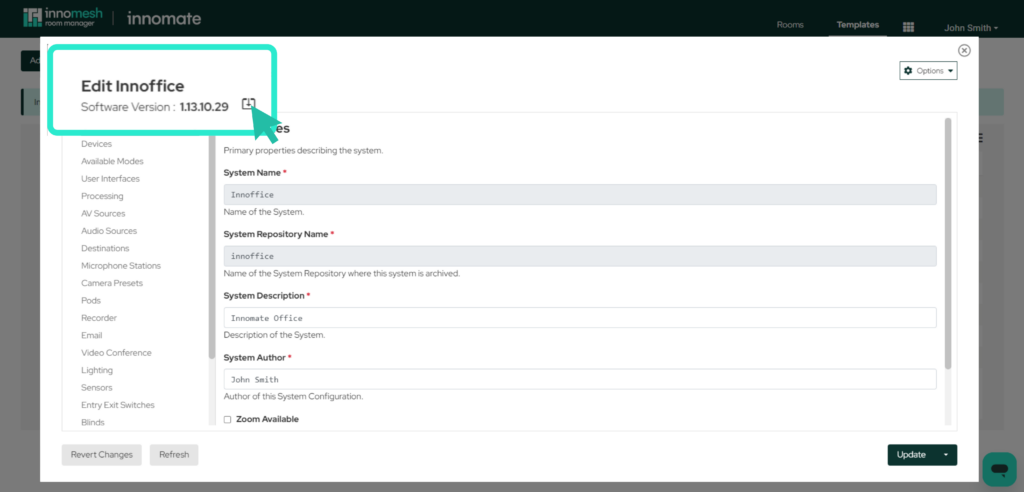
The current software version is displayed in the top-left corner of the template editor window. Click the arrow icon beside the version number to open the version selection panel.
Step 3: Select the New Version
A dropdown menu will appear listing all available software versions. Select the desired version from the list.
Review the changes included in the new version before proceeding. Consider testing major version upgrades on a separate template with a small number of rooms before rolling out changes to production.
Step 4: Confirm the Update
Click the Change button to execute the software upgrade. All rooms using this template will be re-provisioned with the new software version.

Best Practices
- Schedule updates during off-hours. Because all rooms under the template will restart, plan updates for times when the rooms are not in use.
- Maintain a test template. If many rooms share a single template, create an identical test template with one or two rooms underneath it. Apply major software updates to the test template first to verify compatibility before updating the production template.
- Back up before updating. Export the template as a JSON file before making changes, so you have a record of the previous configuration.