This guide covers the process for deploying new Pulse or Sight rooms within the Innomesh Room Manager system.
Initial Setup
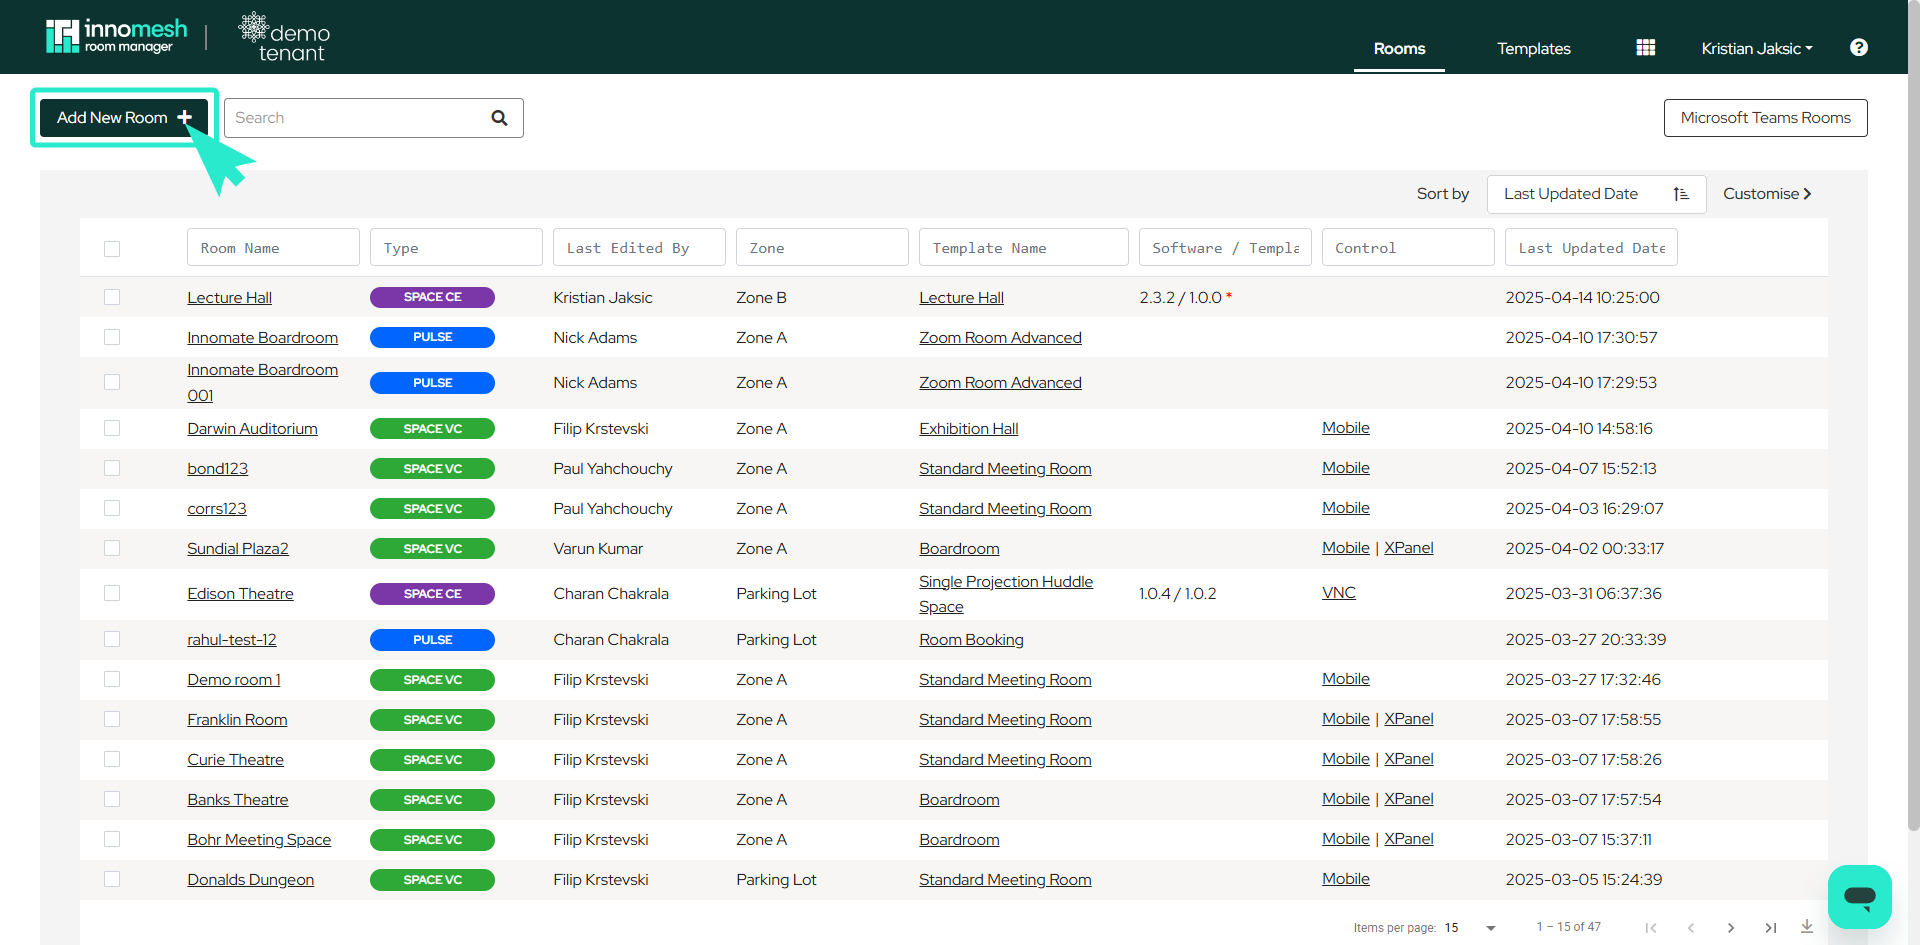
Navigate to the Room Manager Rooms page and select Add New Room in the top left corner.
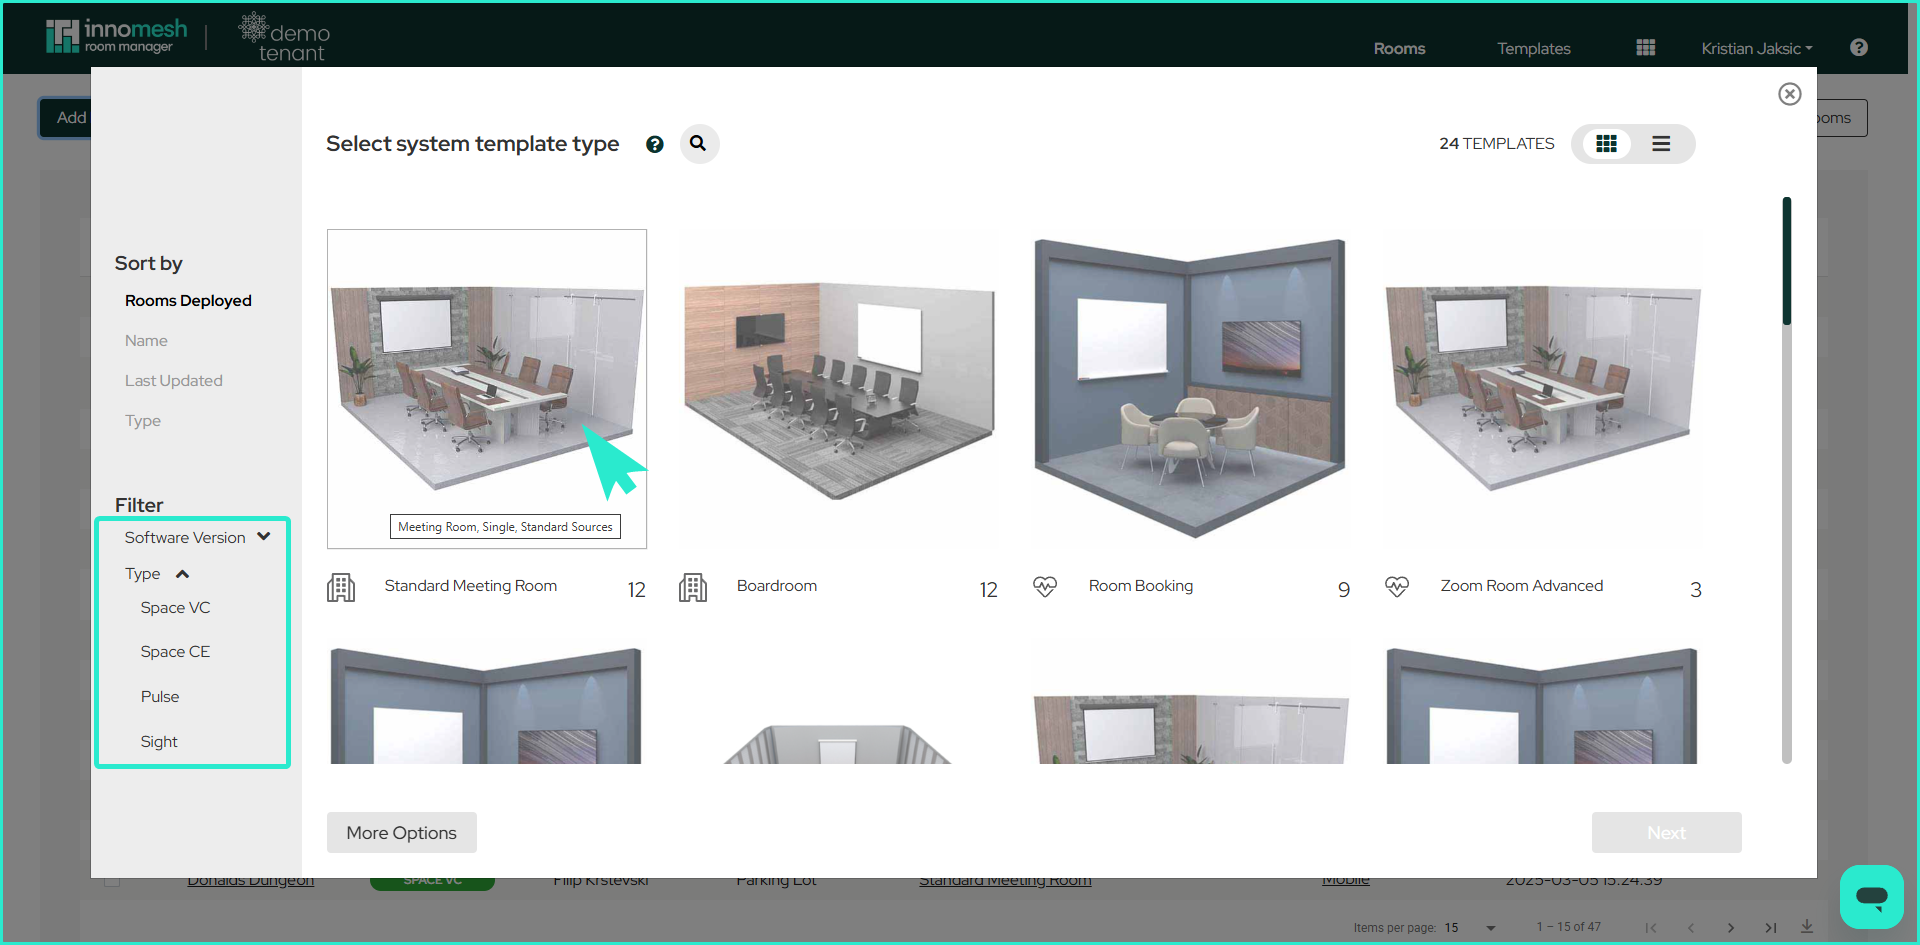
A popup will display the available templates. Choose your desired Pulse or Sight template and click Next.
Zone Selection
Select the appropriate zone for deployment. The Parking Lot zone stores inactive rooms with disabled functionality, which can be useful for staging. Click Next to proceed.

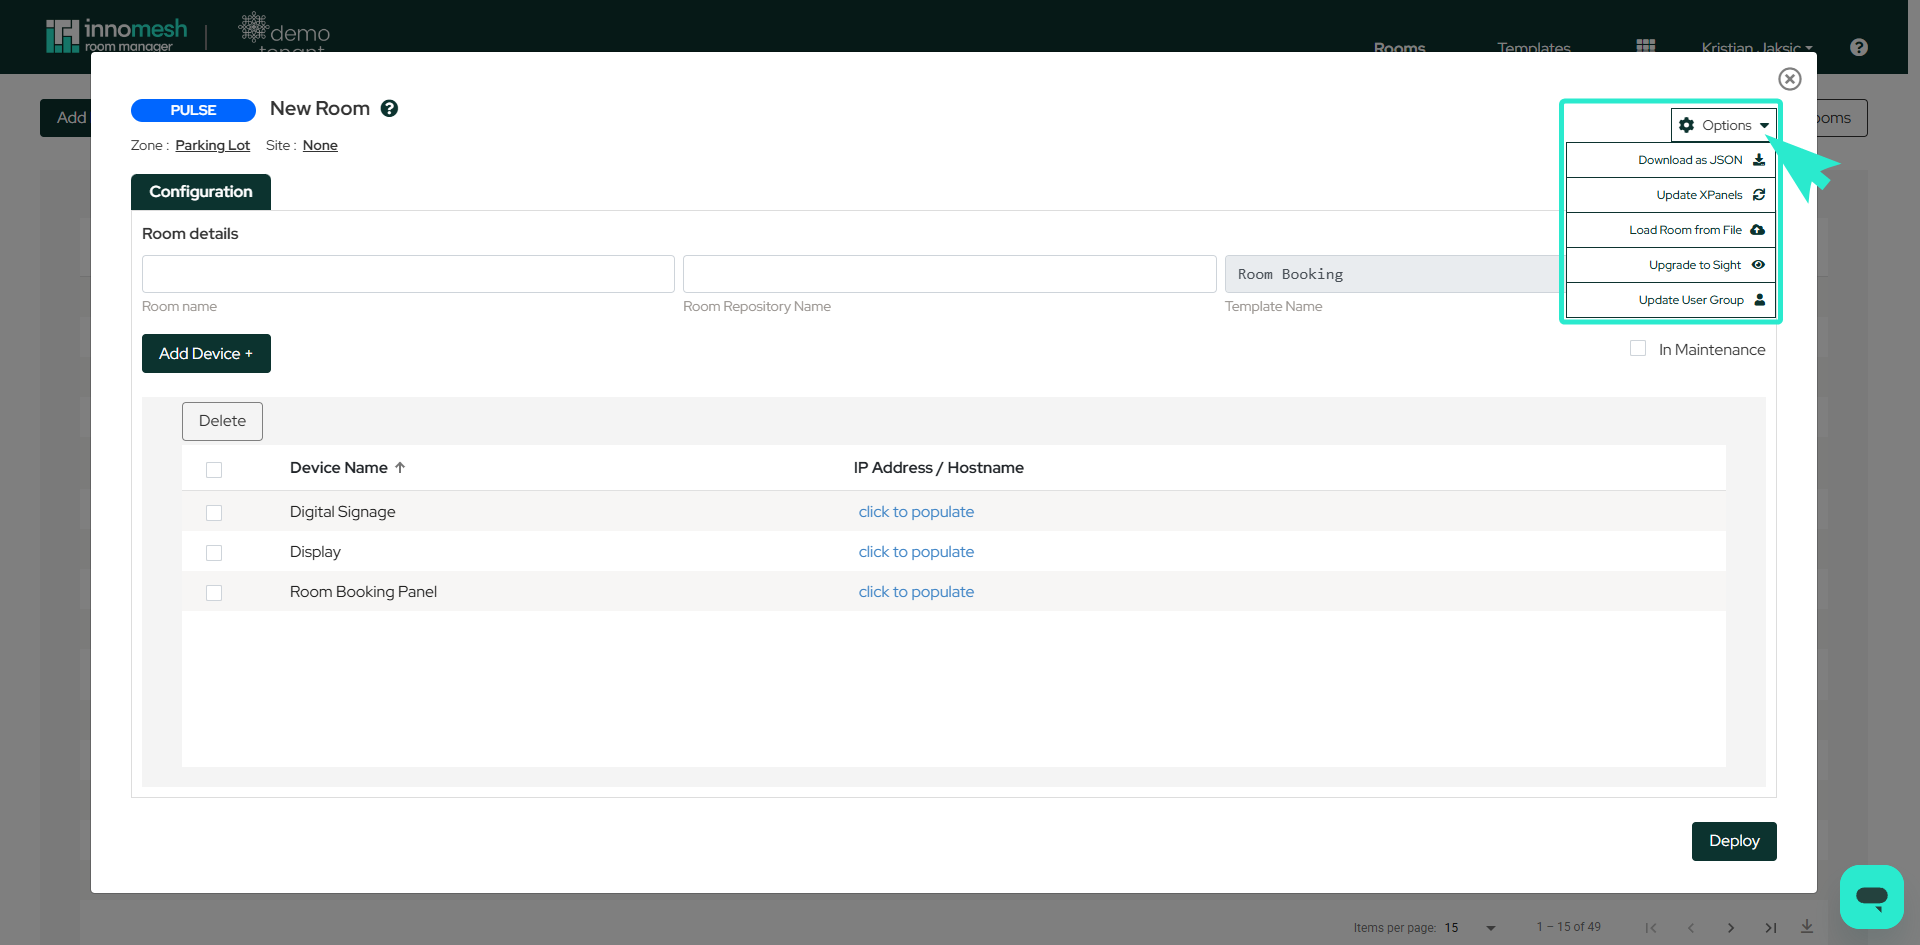
Main Configuration View
The configuration page includes several key elements.
- Room Name and Repository Name: The friendly name and repository storage location. The repository name auto-generates but can be customised before creation. Note that the repository name cannot be changed after the room is created.
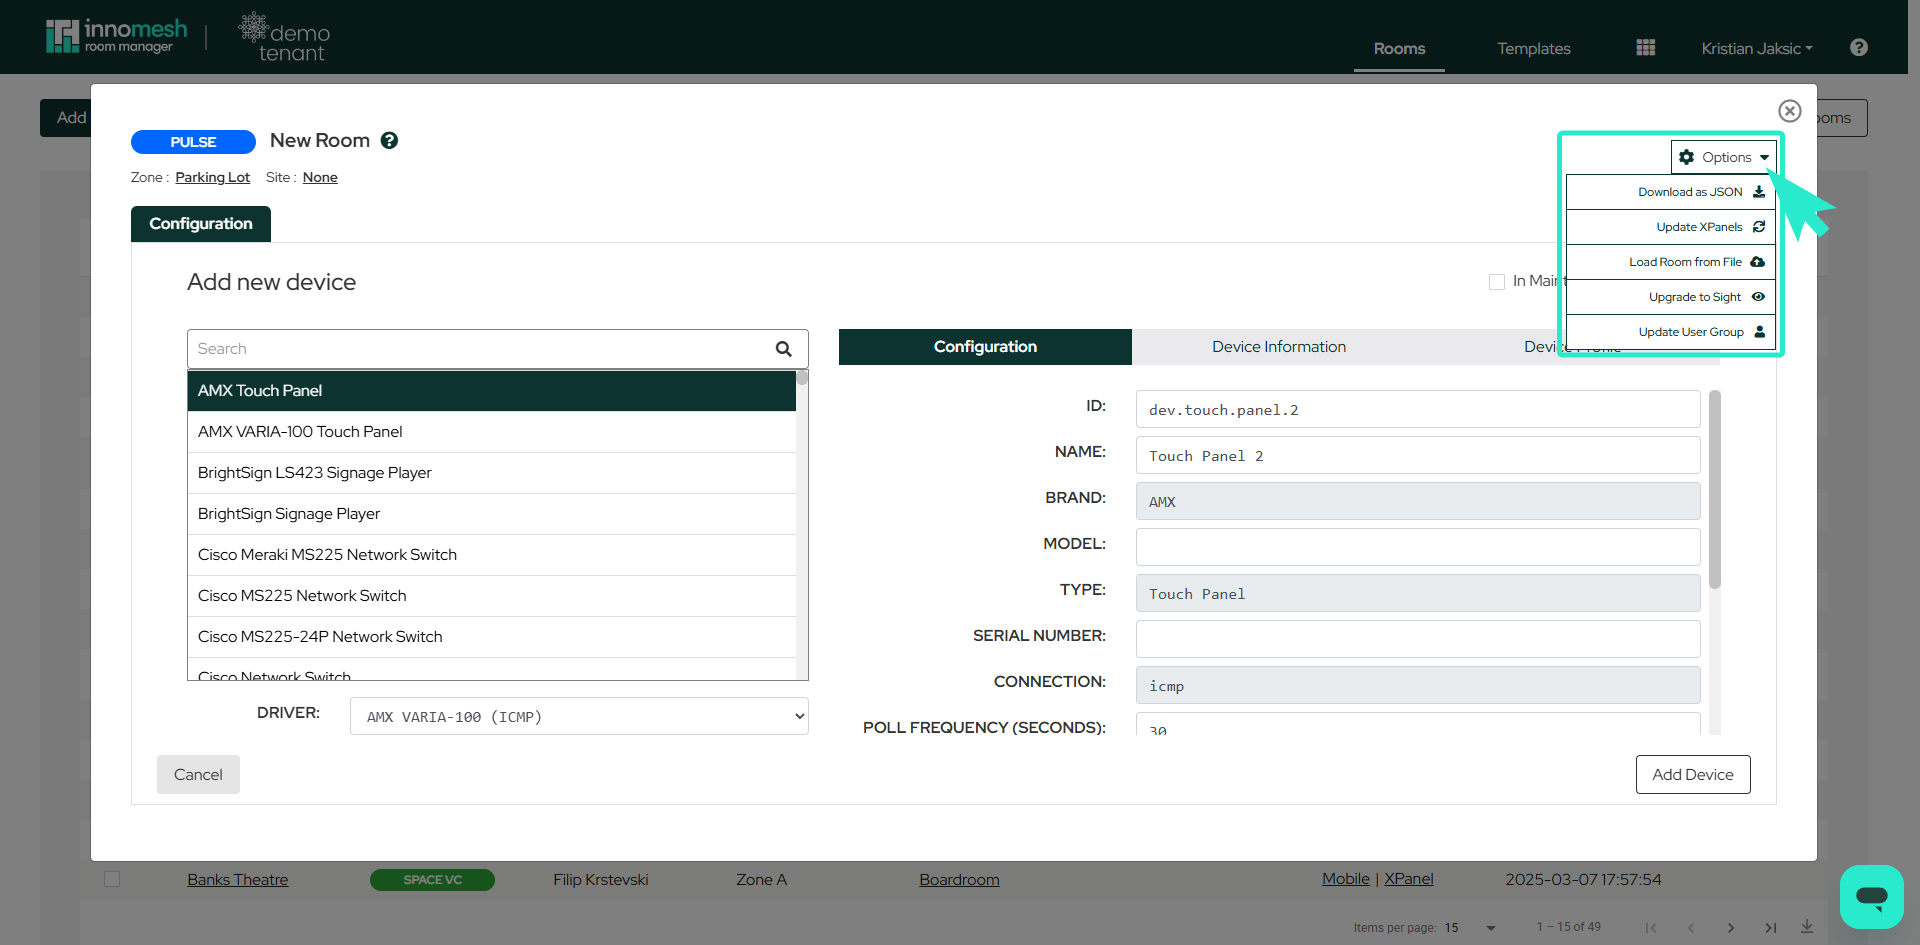
- Options Dropdown: Provides functions such as Download as JSON, Update XPanels, Load Room from File, Upgrade to Sight, and Update User Group.
- Add Device: Button to begin adding new devices to the room.
- In Maintenance: Checkbox to divert alerts to the Suppressed list when the room is non-functional or under construction.
- IP Address/Hostname: Network identification for each device.
- Edit/Duplicate/Delete: Manage individual devices using inline controls. Devices can be duplicated, edited, or deleted directly from this view.
- Deploy and Revert: Deploy configurations or undo recent changes.
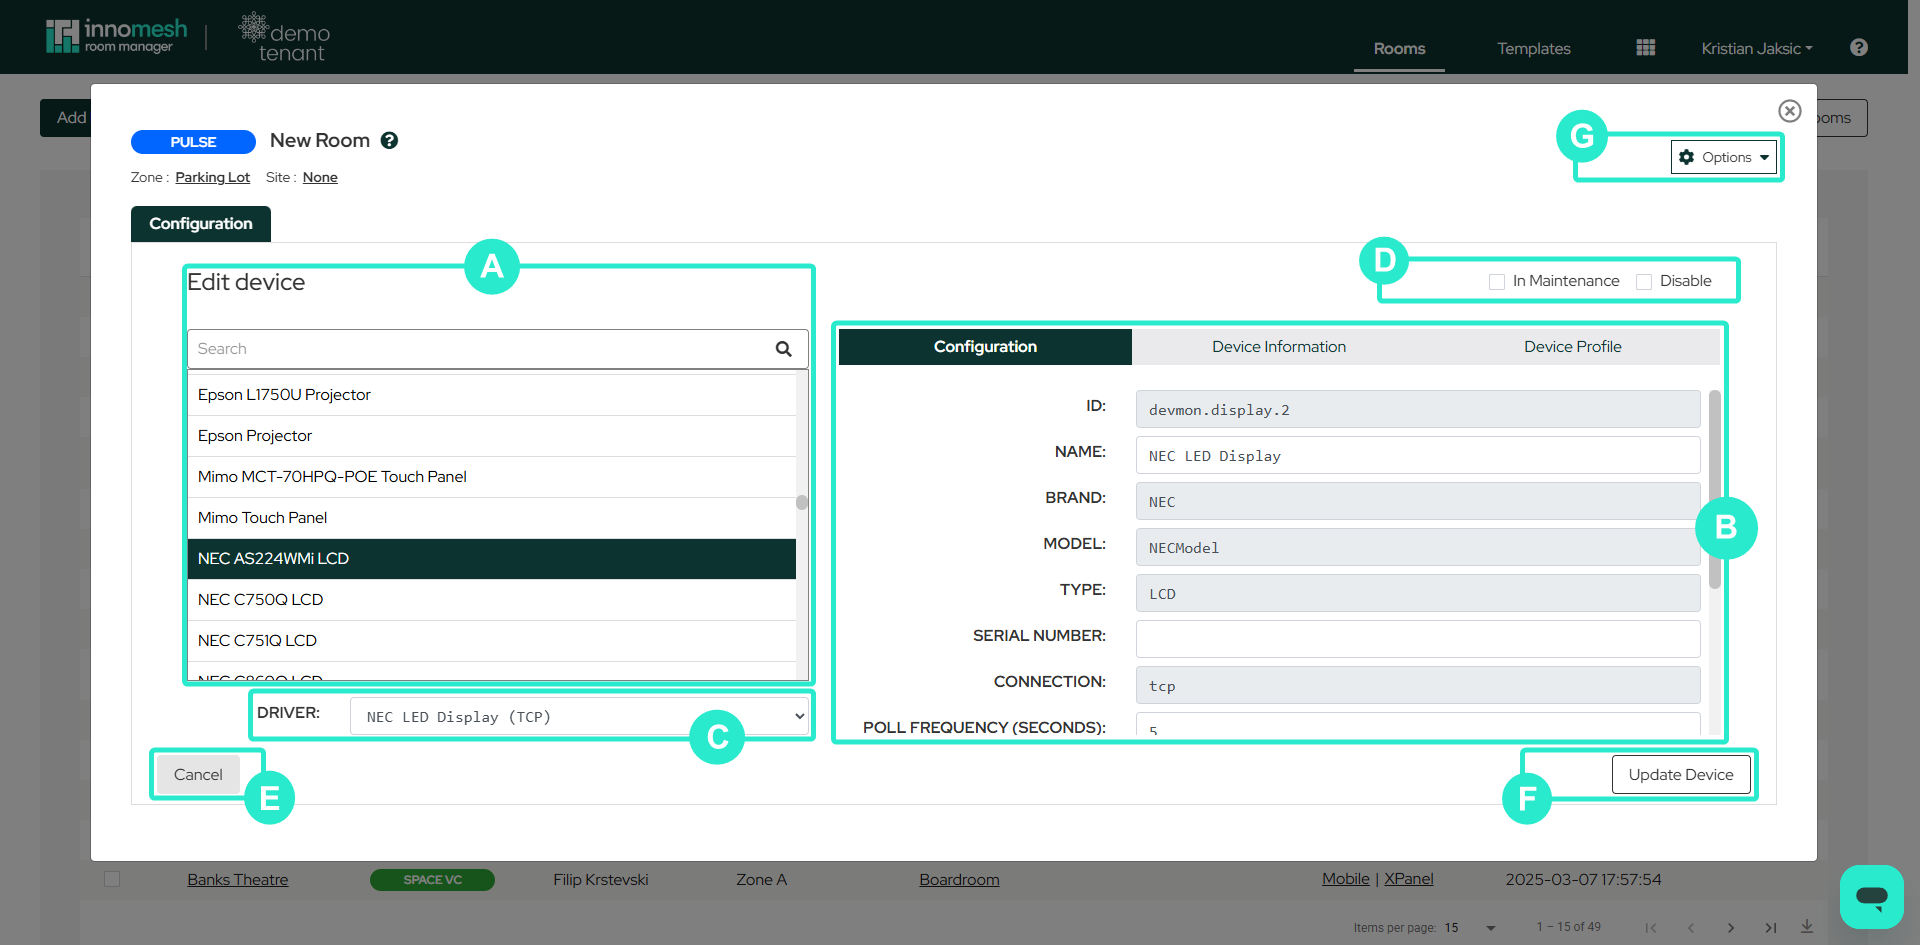
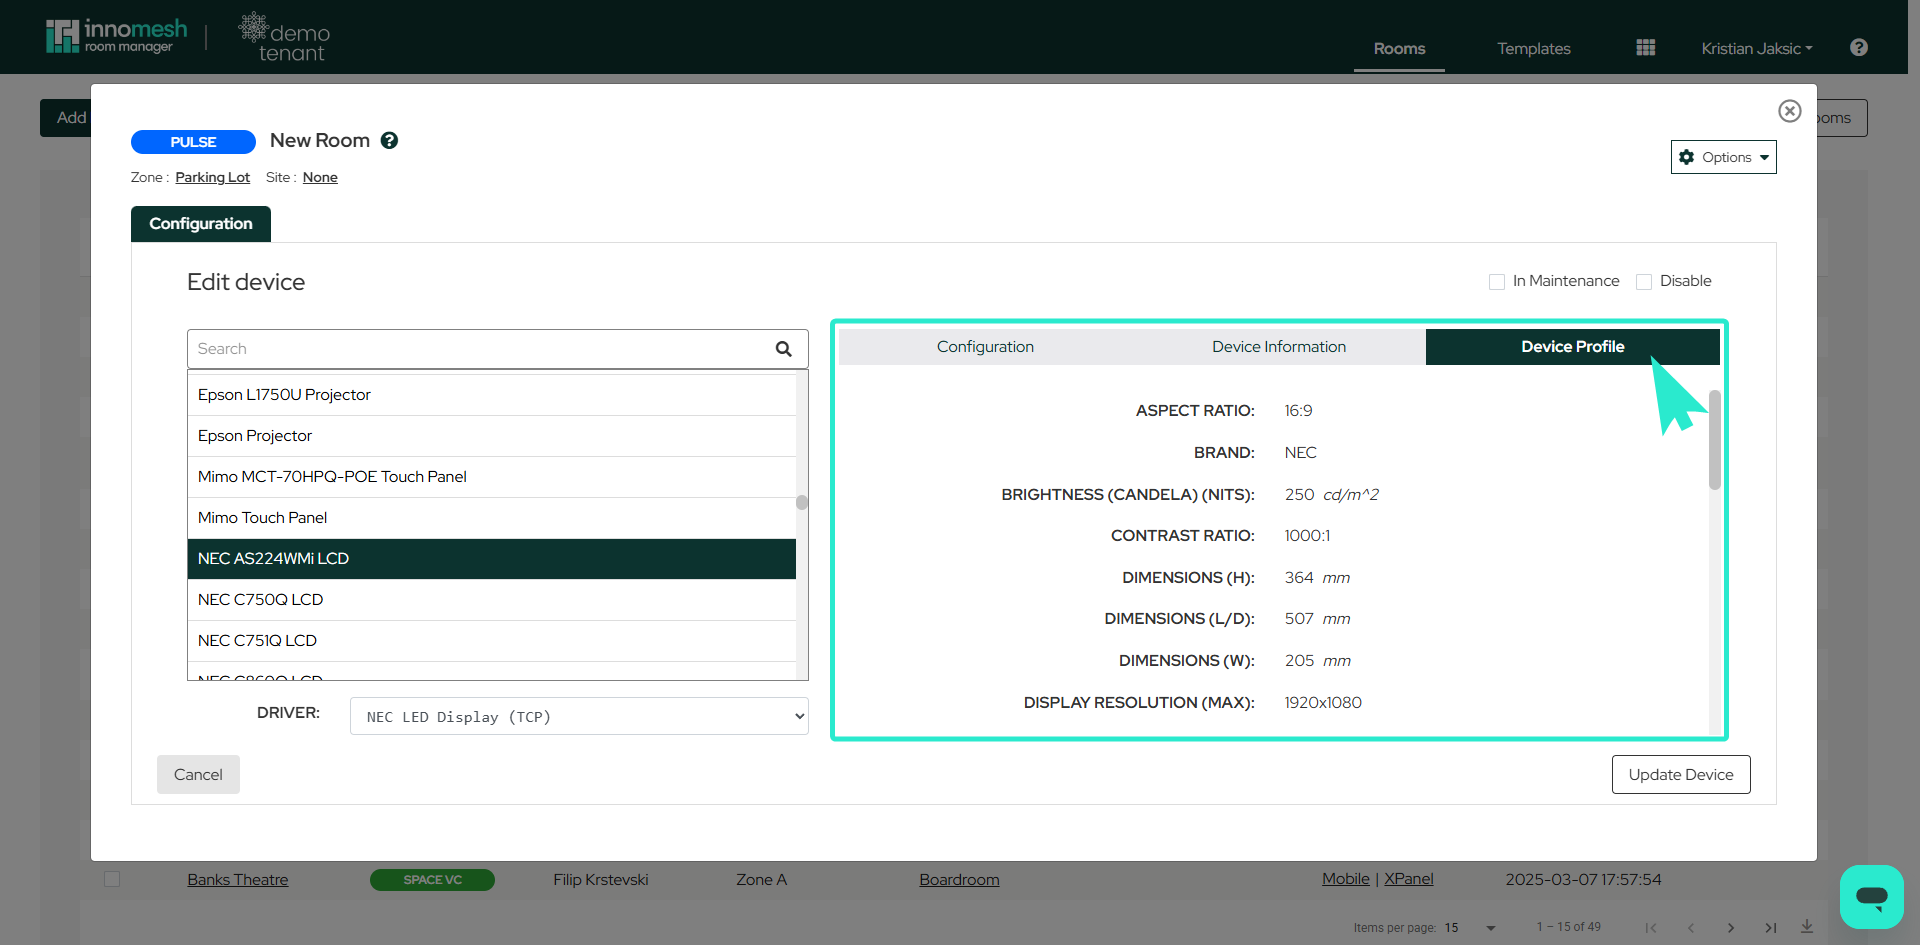
Device Configuration
When adding or editing a device, the following elements are available.
- Search Bar: Locate specific devices to configure.
- Configuration Tab: Input device details including ID, Name, Brand, and Model.
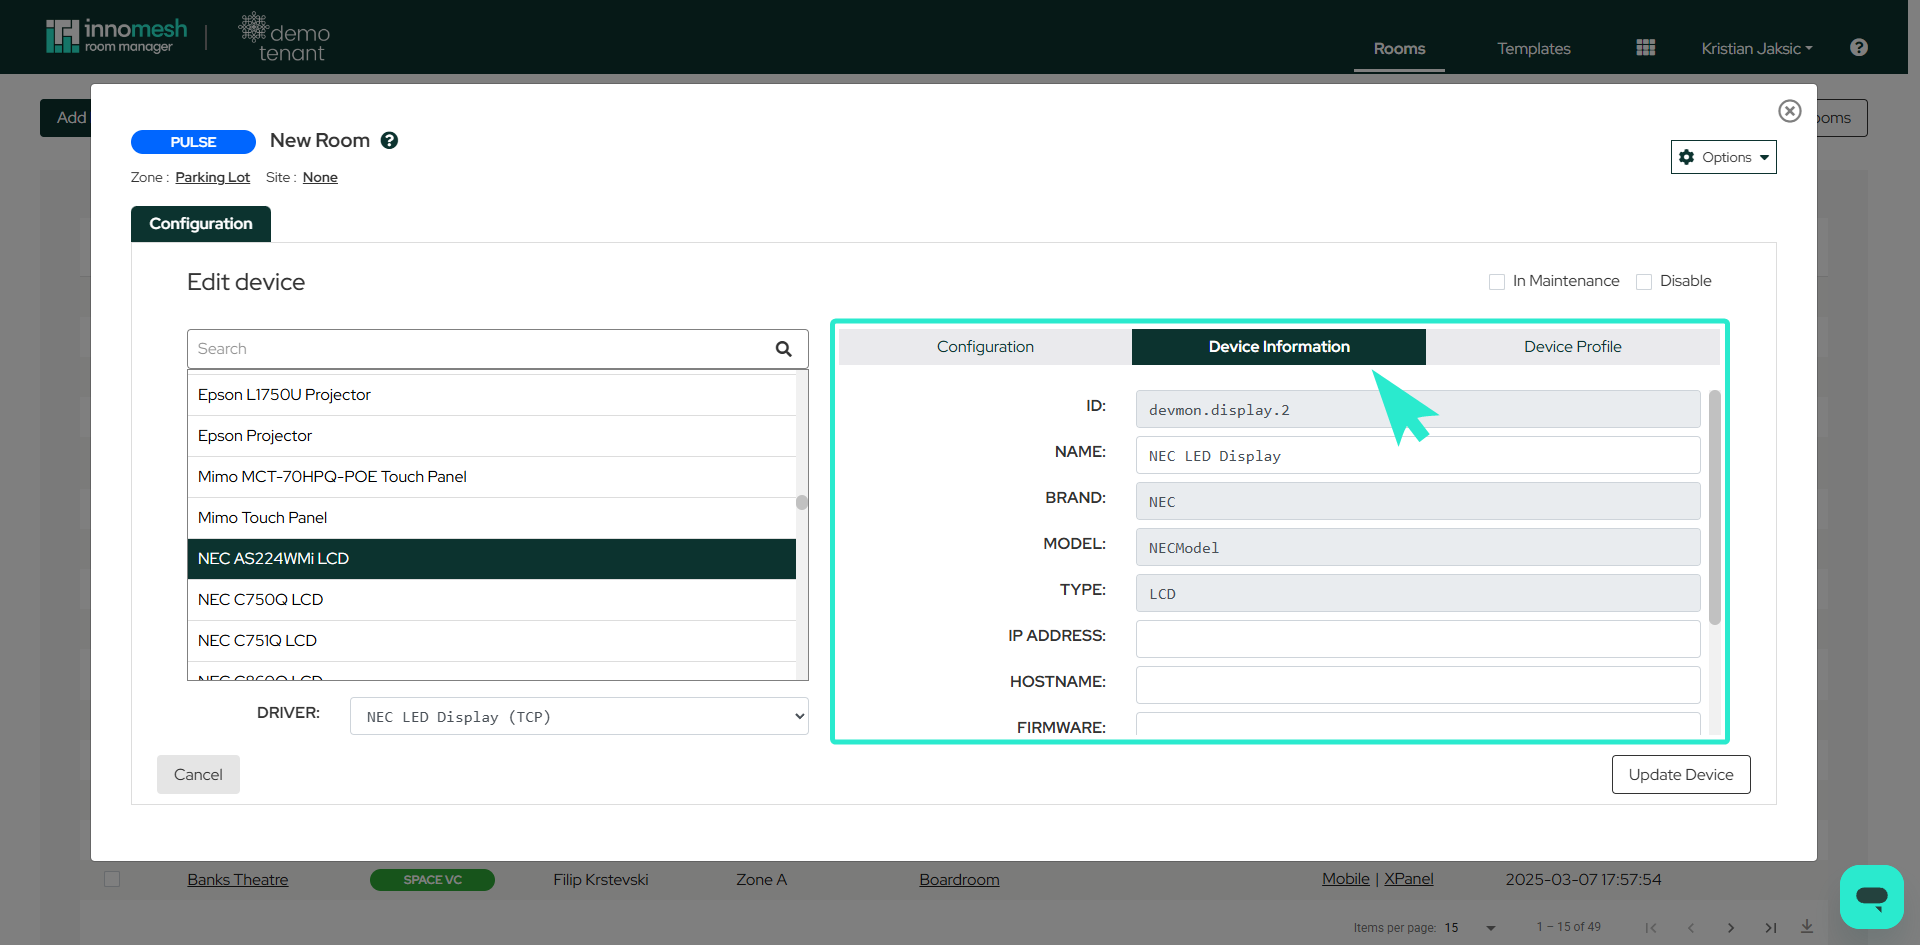
- Device Information Tab: Network and hardware details such as IP, hostname, firmware version, and MAC address.
- Device Profile Tab: Detailed device specifications.
- Driver Section: Displays the selected device driver and connection type.
- In Maintenance/Disable: Suppress alerts or disable devices as needed.
- Update Device Button: Confirm and apply configurations.
Model numbers are strongly recommended. Adding a model number enables features such as Sight monitoring and Asset Profiles.
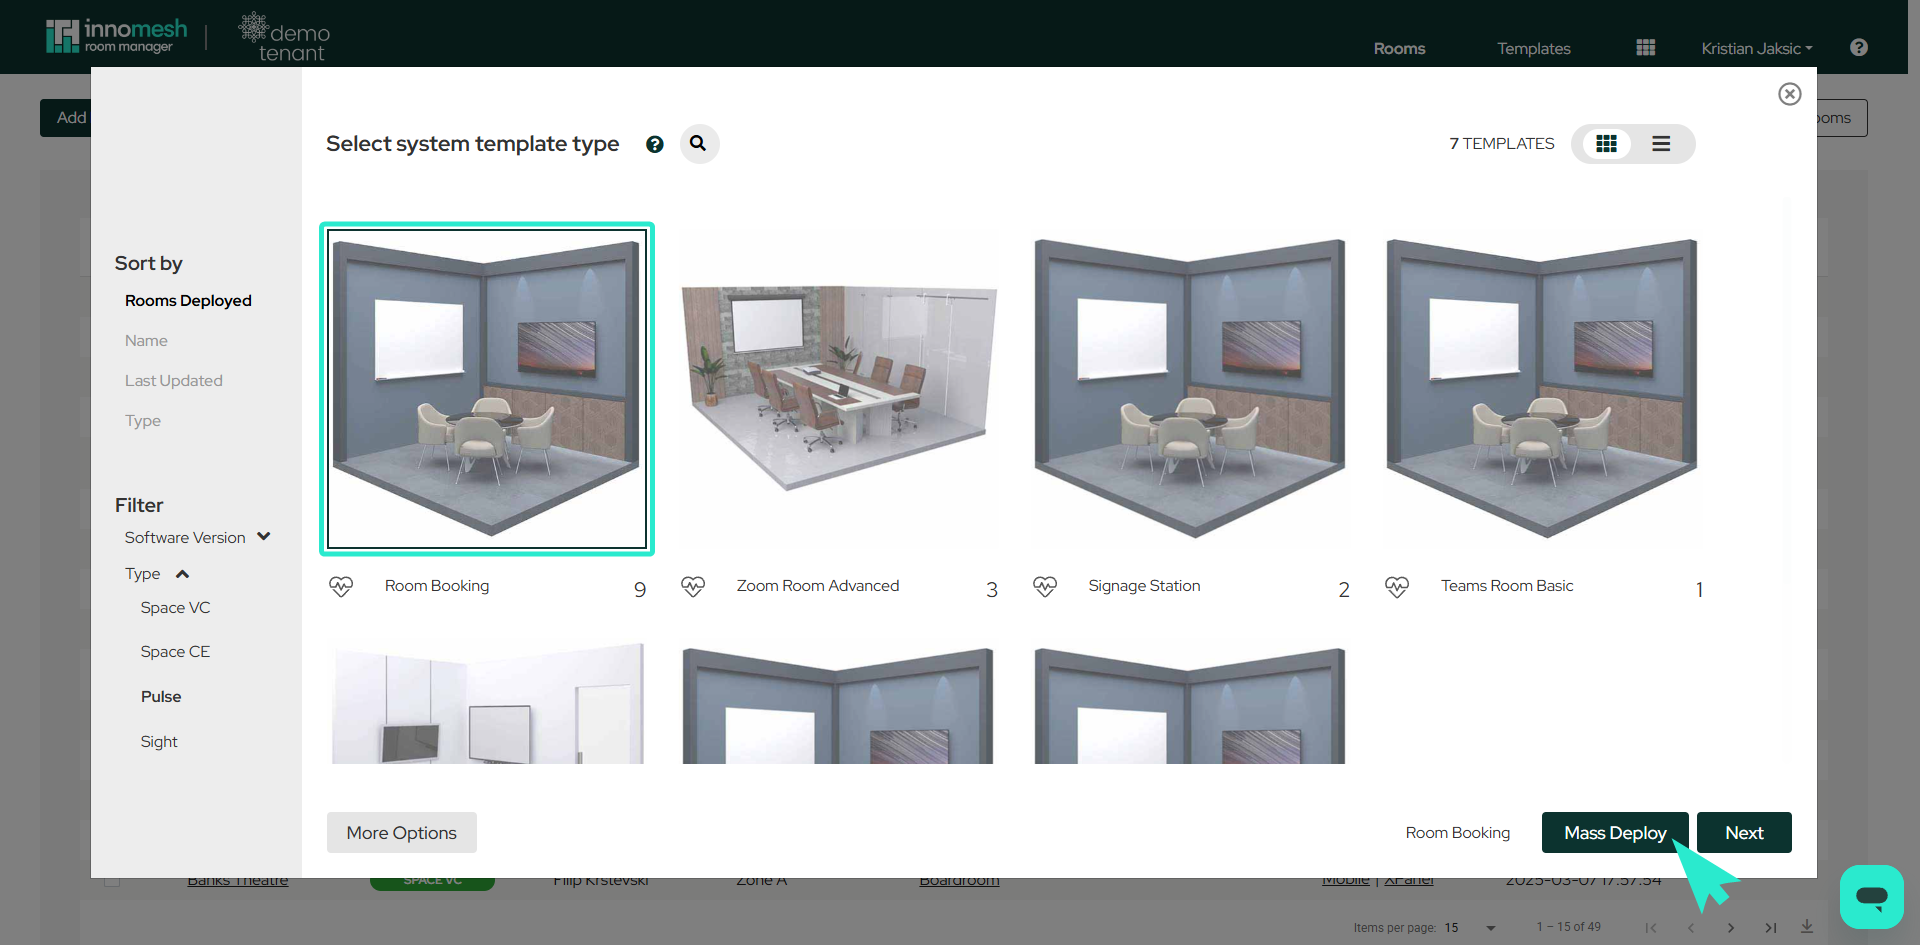
Mass Deployment
To mass deploy Pulse rooms, navigate to the Rooms tab and click Add New Room in the top left of the page. Select the template to deploy, then click the Mass Deploy button in the bottom right of the window to open the mass-deployment view.
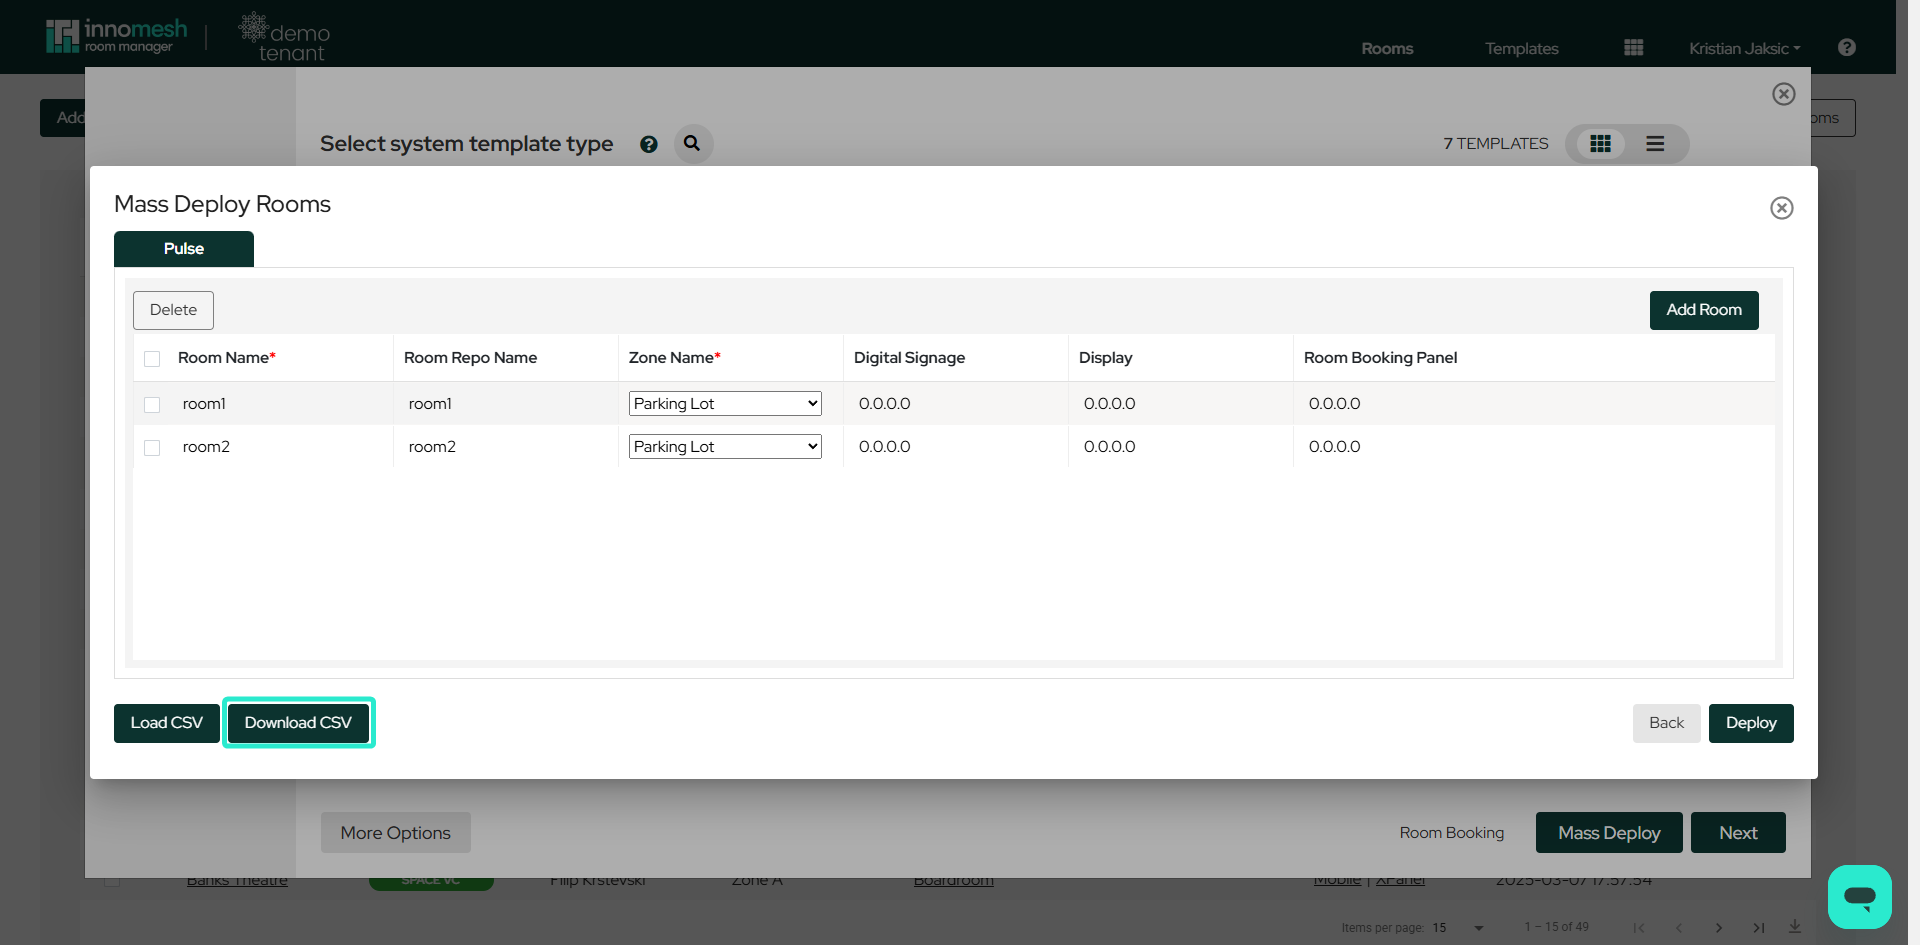
From the mass-deployment view you can:
- Add rooms: Use the button in the top right corner of the window.
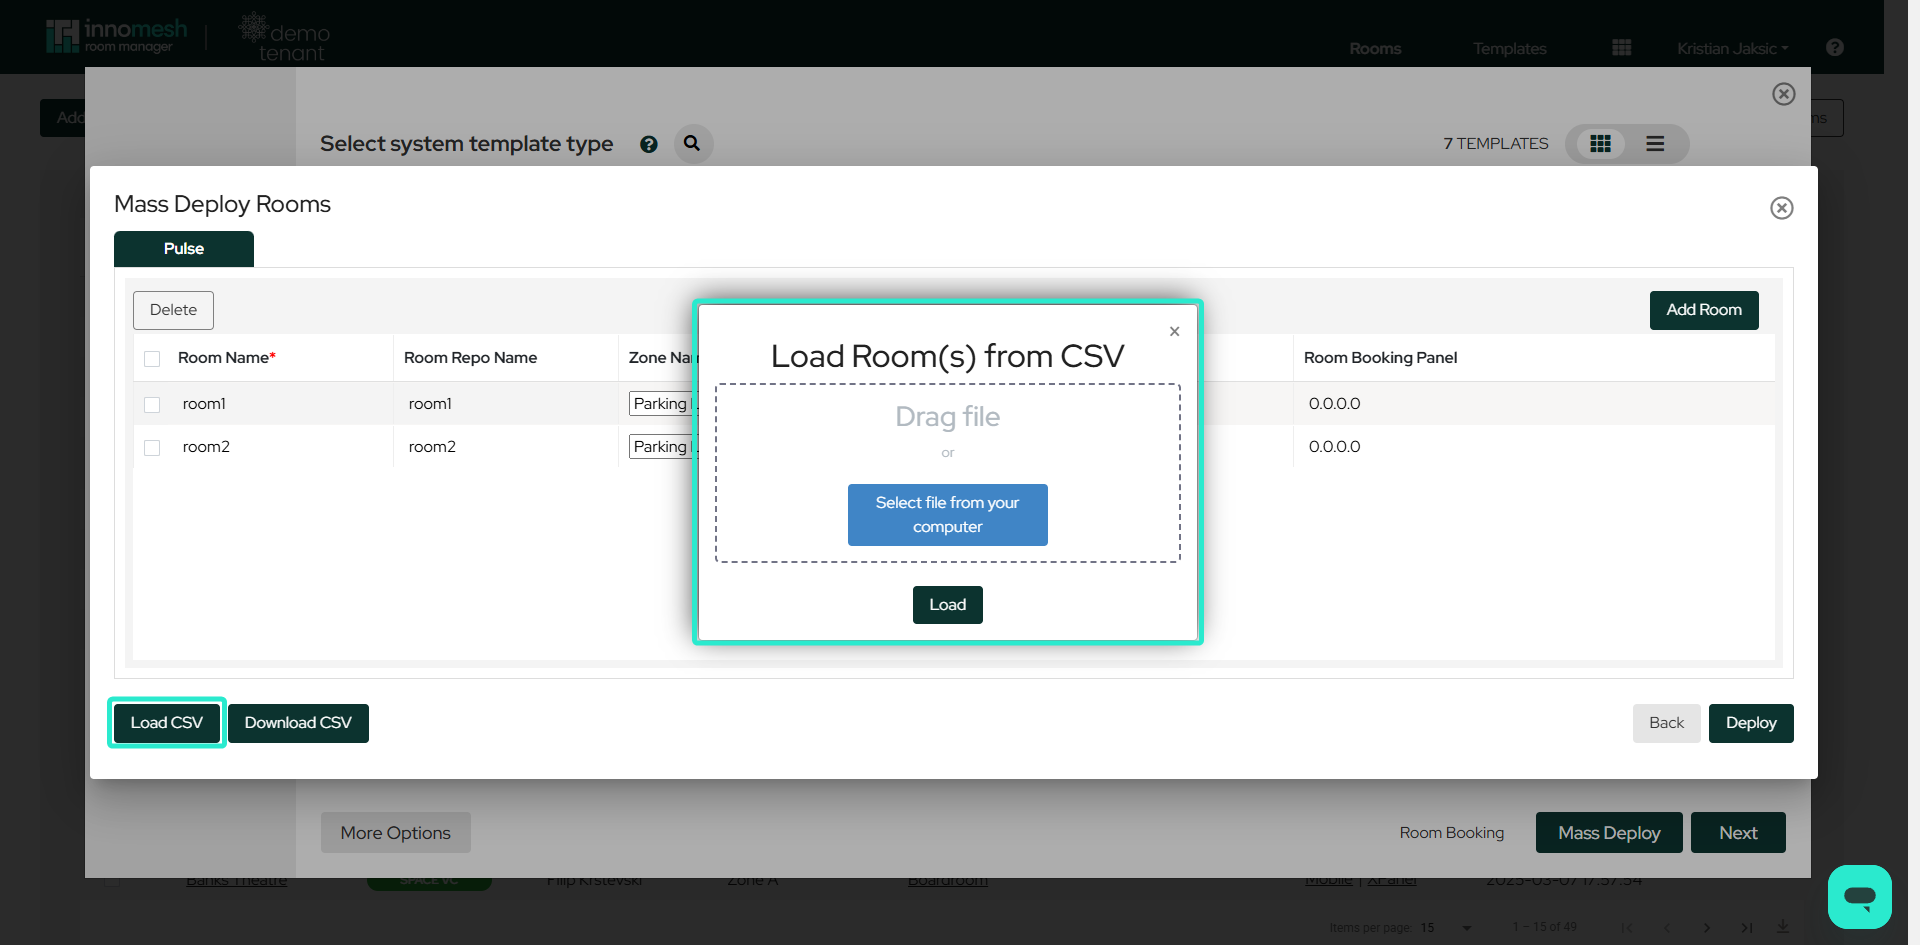
- CSV operations: Load a CSV or download the current configuration to CSV from the bottom left.
- Bulk deployment: Deploy all configured rooms using the button in the bottom right corner.

CSV Requirements
CSV files must contain three columns (Room Name, Room Repo Name, Zone) plus one column per device. It is recommended to download an existing CSV first to see the correct format.
Deploy rooms to the Parking Lot zone initially to prevent offline device alerts from reaching the Portal Hotlist.