Overview
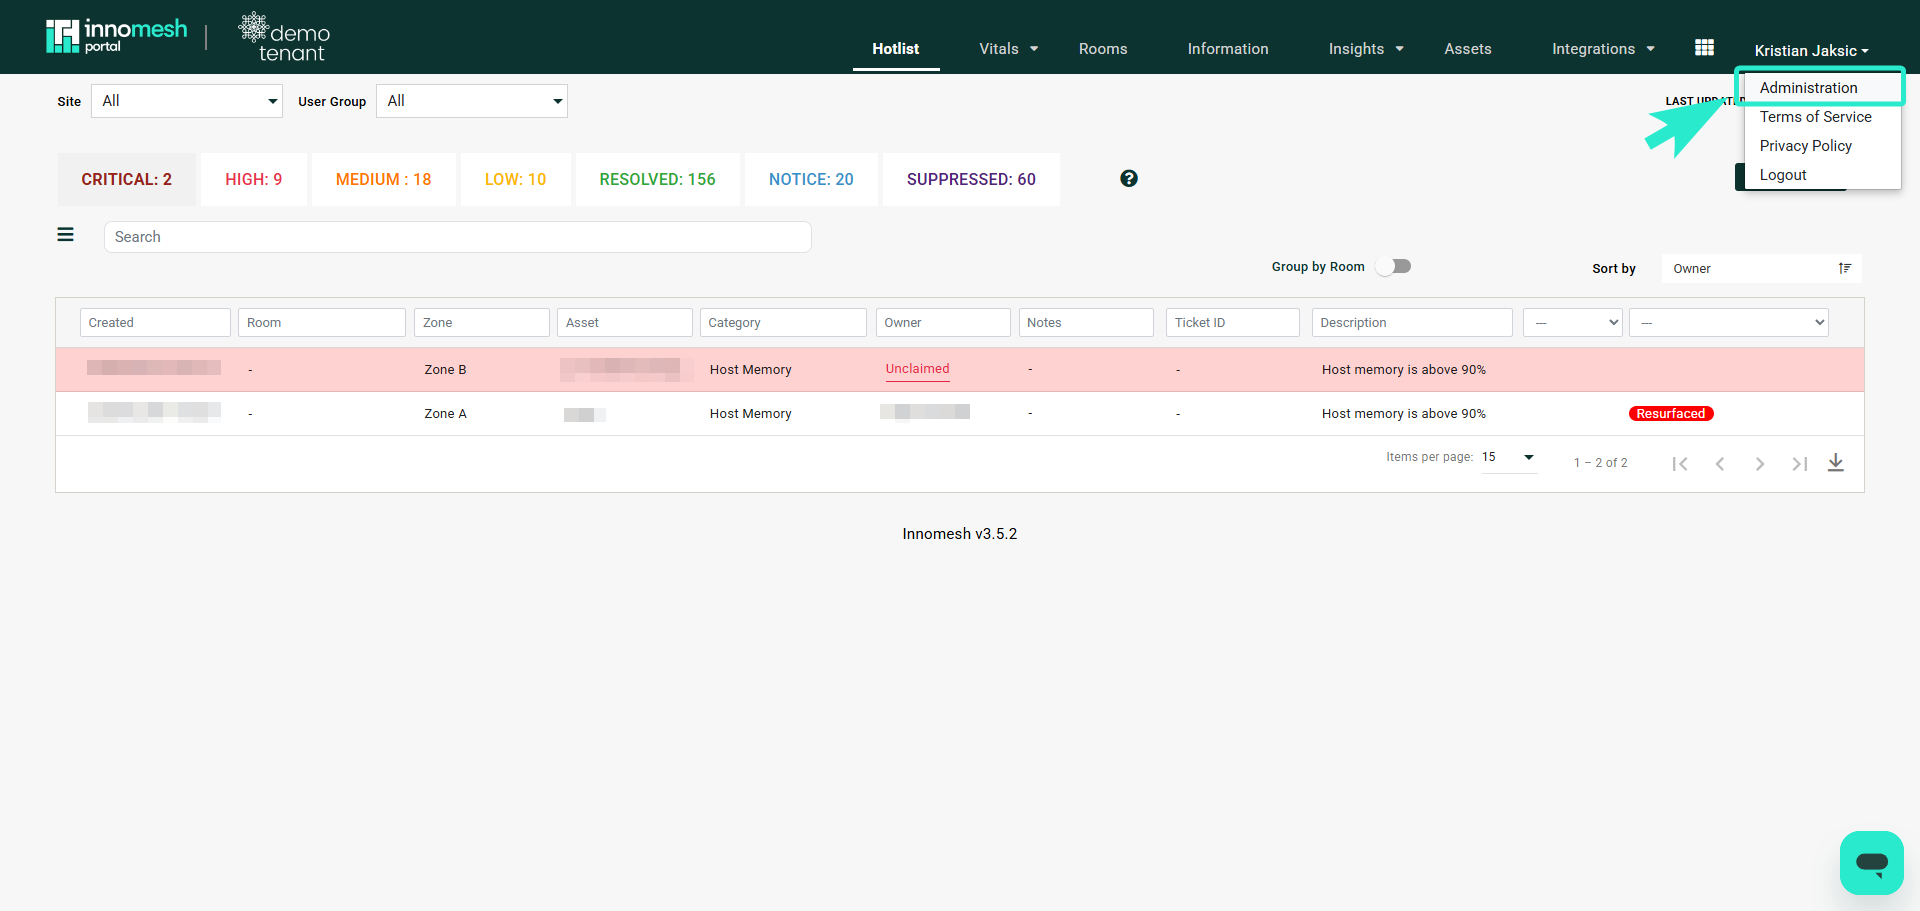
The Administration Settings page in Innomesh Portal provides tools for managing platform operations, user access, assets, and data synchronisation. The page is organised into the following sections: Settings, Data Import/Export, Room Attributes, Assets, Users, and Logs.
Settings
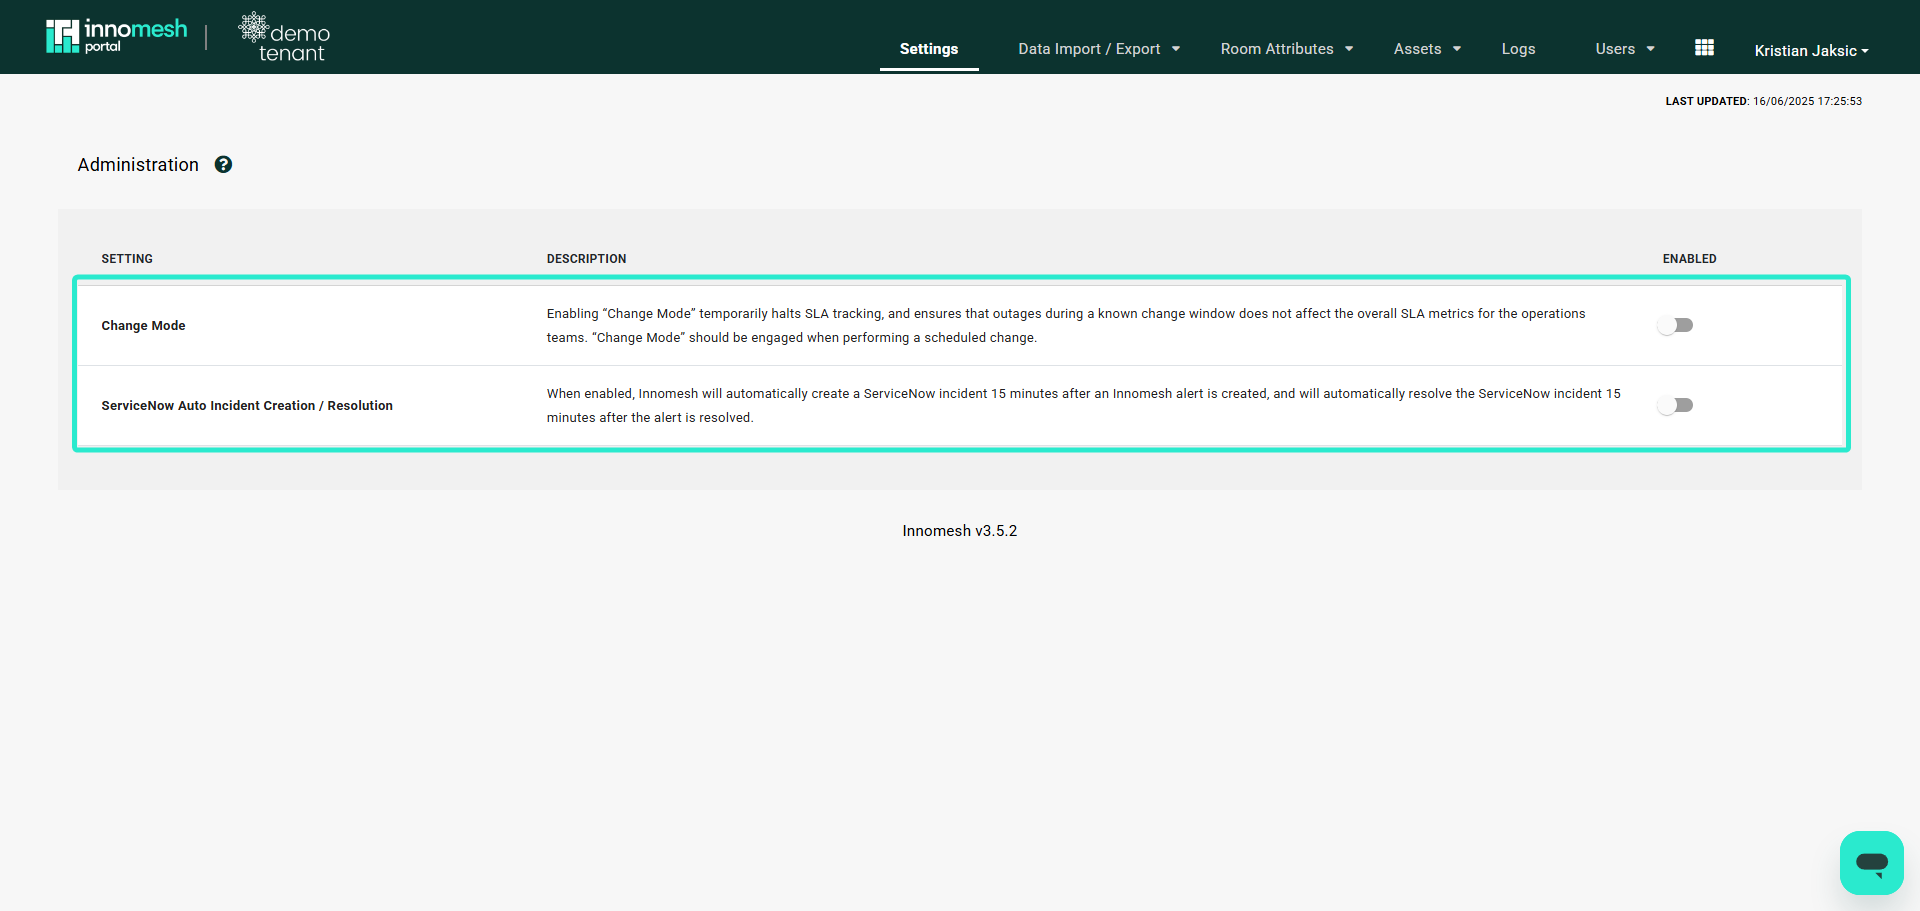
The Settings tab allows administrators to enable or disable platform-wide operational features.
Change Mode
Change Mode temporarily halts SLA tracking during scheduled maintenance windows. When enabled, outages that occur during the maintenance period do not affect SLA metrics. This is useful for planned network changes, firmware upgrades, or infrastructure work that may temporarily disrupt device connectivity.
ServiceNow Auto Incident Creation and Resolution
When enabled, this feature automatically creates a ServiceNow incident 15 minutes after an Innomesh alert is raised and resolves the incident 15 minutes after the alert is resolved. This provides a buffer to filter out transient issues while ensuring persistent problems are captured in the ITSM workflow.
Change Mode Confirmation
When toggling settings such as Change Mode, a confirmation popup appears to verify the user’s intent. Selecting YES, ENGAGE confirms the action and applies the setting to the Innomesh platform.
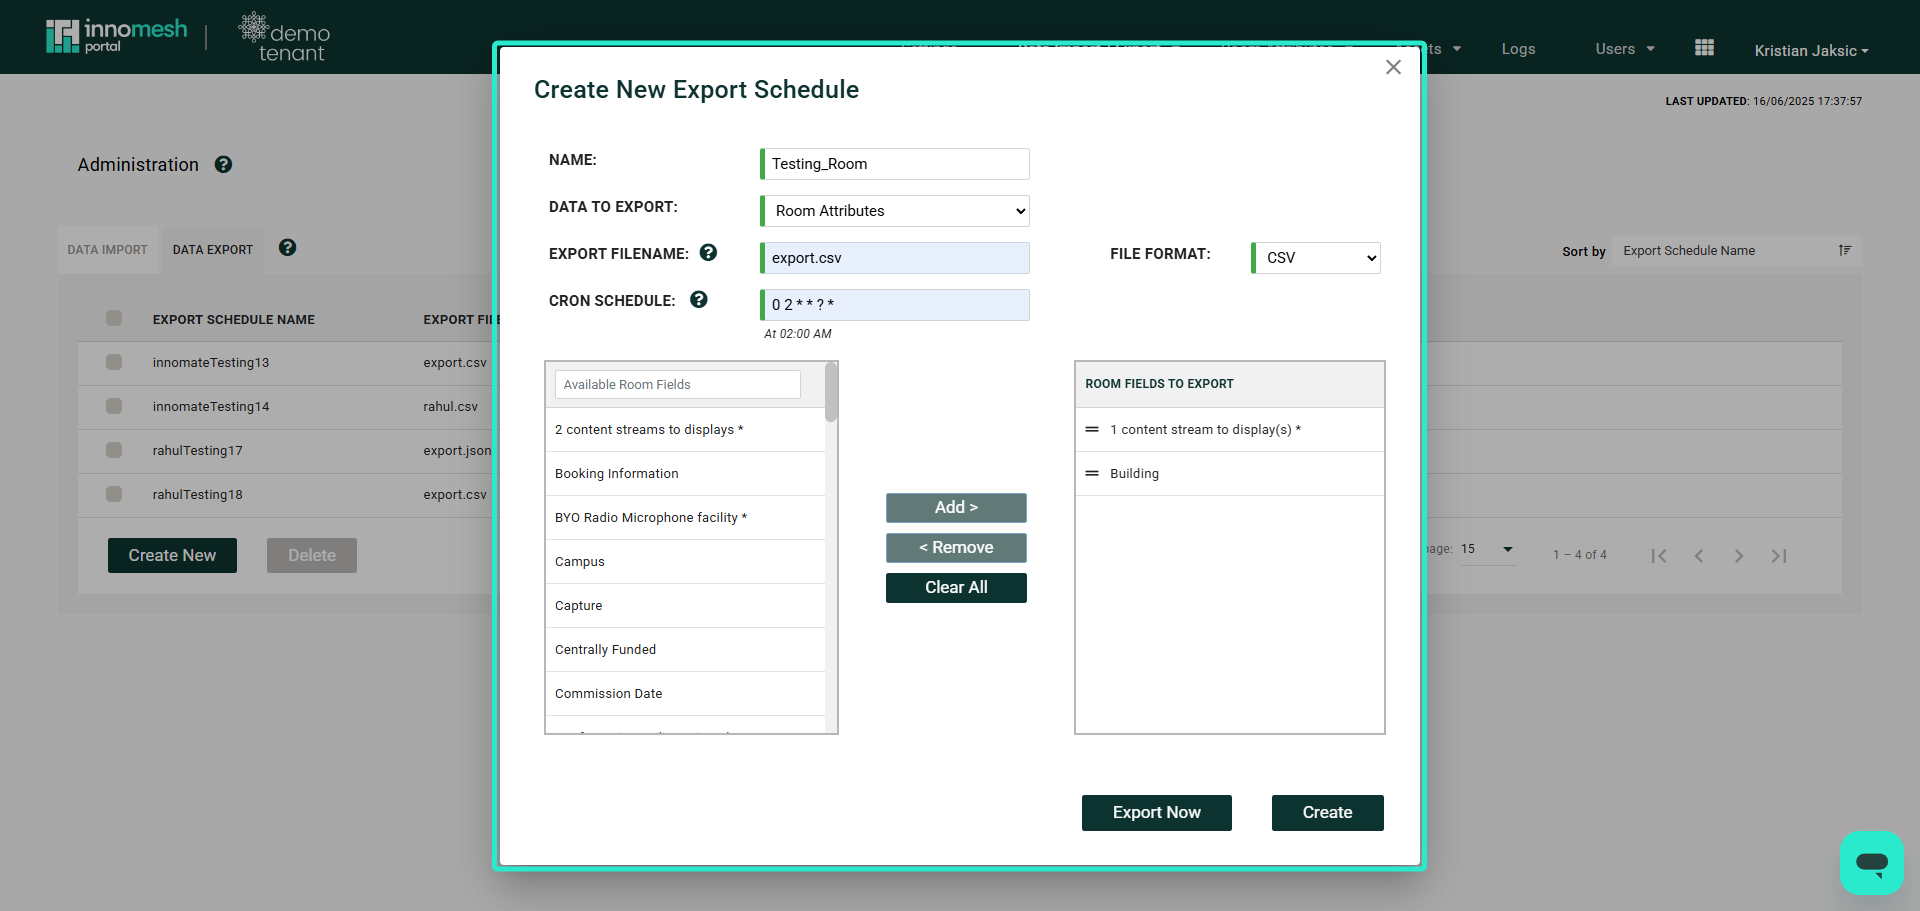
Data Import and Export
The Data Import/Export section provides highly configurable synchronisation with external data sources.
Dynamic Data Import
Automatically syncs external database information with Innomesh on a scheduled basis. Import configurations define the data source, field mappings, and synchronisation frequency.
Dynamic Data Export
Sends Innomesh data to external systems for processing. Export configurations define which data is shared, the target system, and the export schedule.
Manual Import
Upload CSV or JSON files directly via the browser for one-off data imports. This is useful for bulk updates or initial data population without setting up automated synchronisation.
Both dynamic import and export features use a shared data repository for secure transit.
Room Attributes
Smart Room Attributes
Smart Room Attributes allow administrators to define custom attributes that programmatically query room configurations. Rather than manually checking each room, these attributes automatically extract and display information such as display counts, microphone status, or any other device-level detail.
Creating Smart Room Attributes
To create a Smart Room Attribute, configure the following fields:
| Field | Description |
|---|---|
| Name | Attribute label displayed in the room’s General tab |
| Data Source | Origin of query information (e.g. “Room Configuration (Space Only)“) |
| Grouping | Subsection location within the General tab |
| Type | Format of results: Boolean, Number, or Text |
Derivation Logic
Derivation logic defines how attributes navigate through the Innomesh data model to locate and extract information:
- Configuration Path specifies which path to follow through the room configuration.
- Derivation Strategy retrieves and displays the output value.
- Match Regex defines search specificity for targeted extraction.
- Multi-Condition Match Strategy allows OR/AND logic for combining multiple conditions.
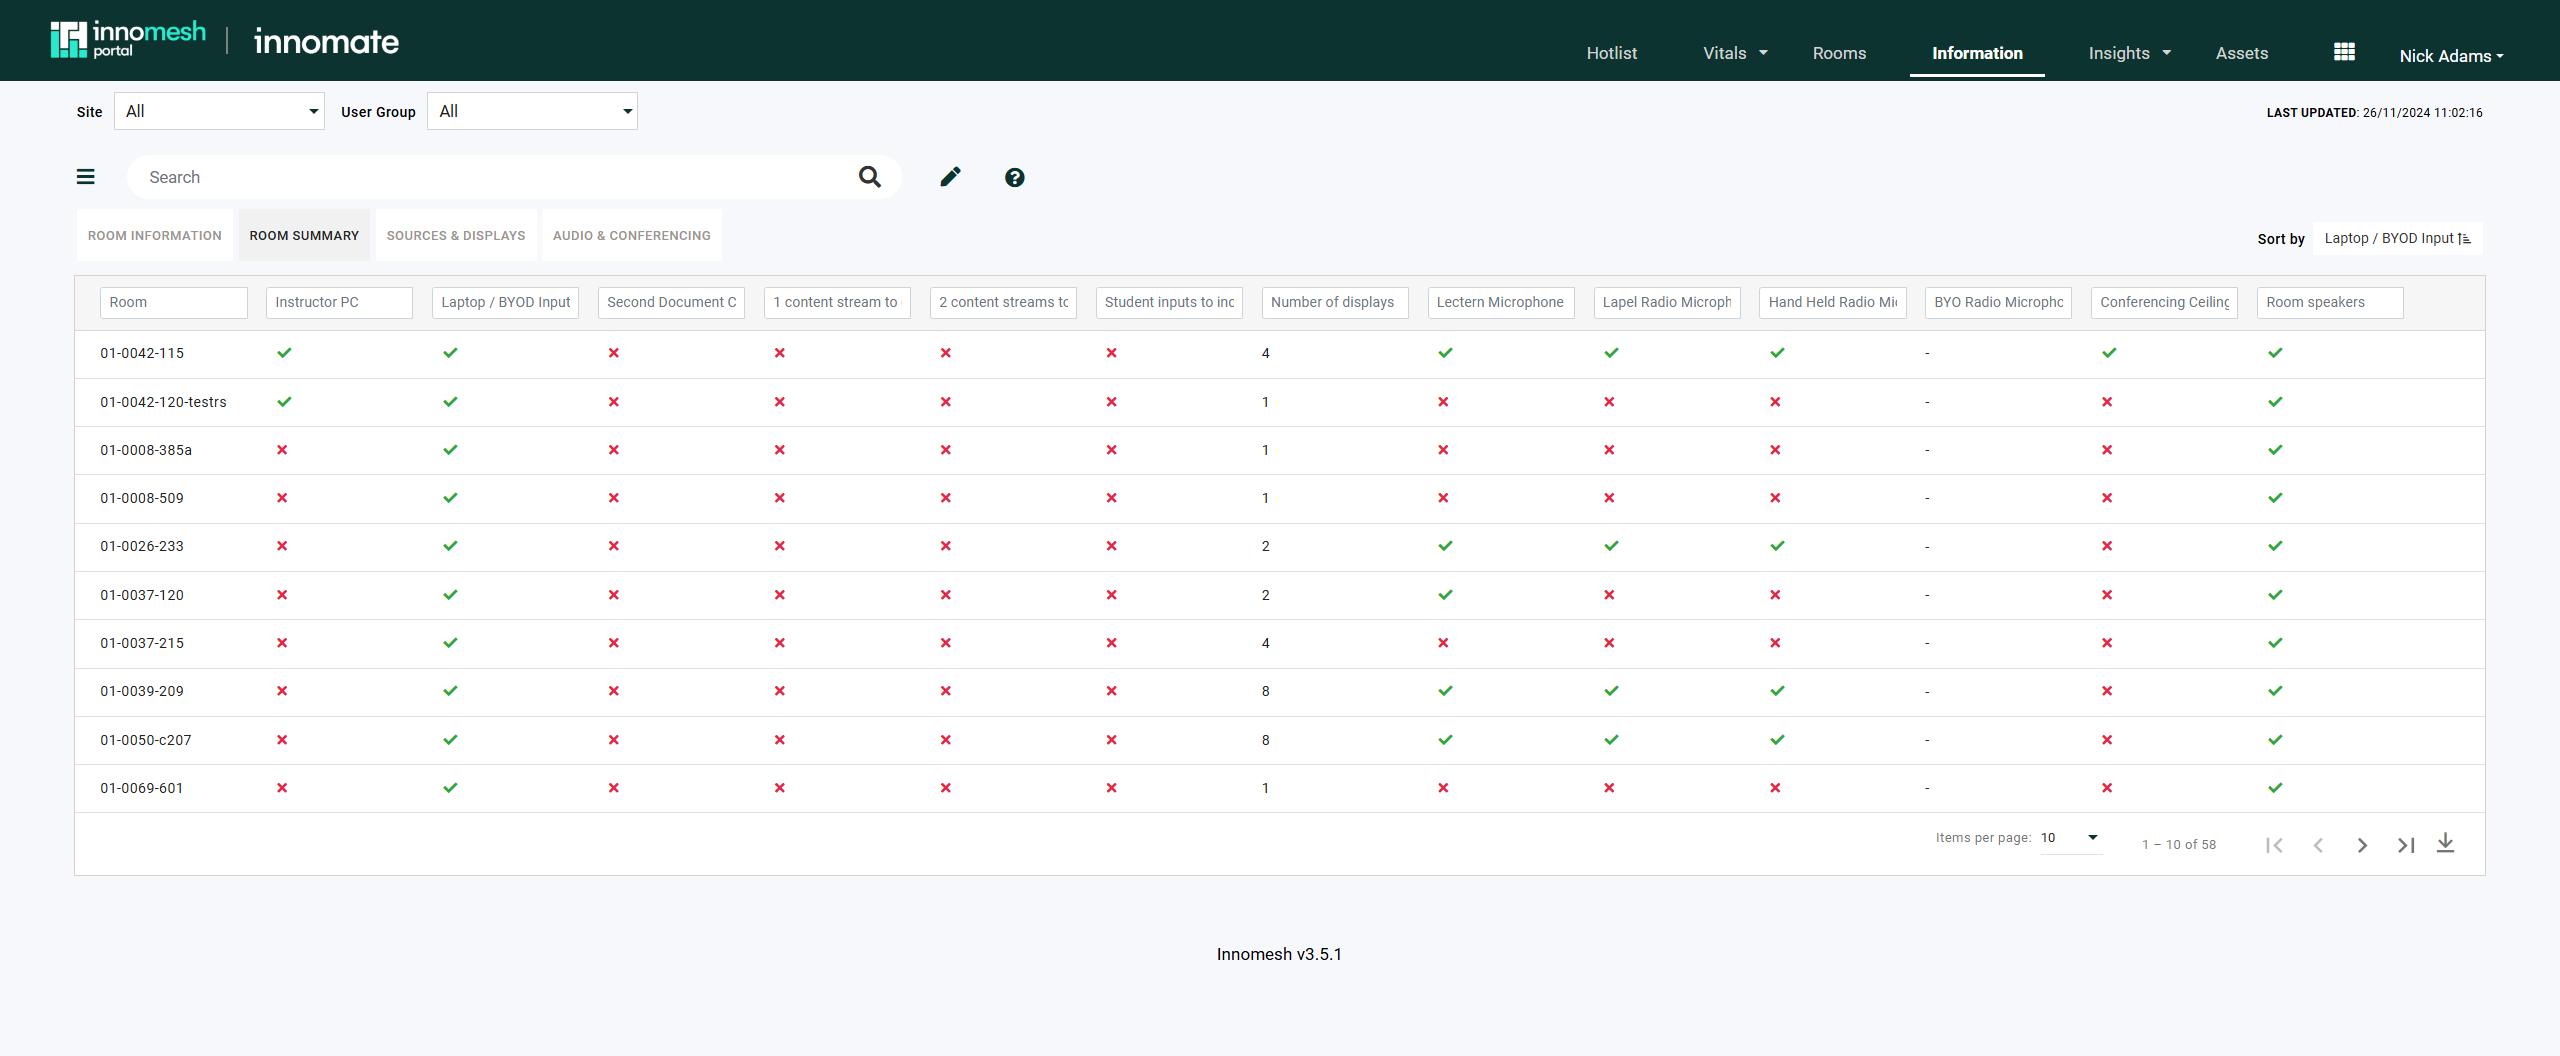
Room Summary Views
Smart Room Attributes and existing room information can be sorted into named views using the Summary Views tab under Administration > Smart Room Attributes. Summary Views make it easy to compare, sort, and evaluate rooms directly from the Information page, with each view surfaced as a tab at the top of the Room Information table.
To create a summary view, navigate to Administration > Smart Room Attributes > Summary Views, click Create New, give the view a name, and select the fields to display on the Information page.
Assets
Asset Profiles
Asset Profiles ensure consistency and normalisation of device information across the platform. Every device in Innomesh must have an asset profile and mapped driver before it can be selected in Room Manager.
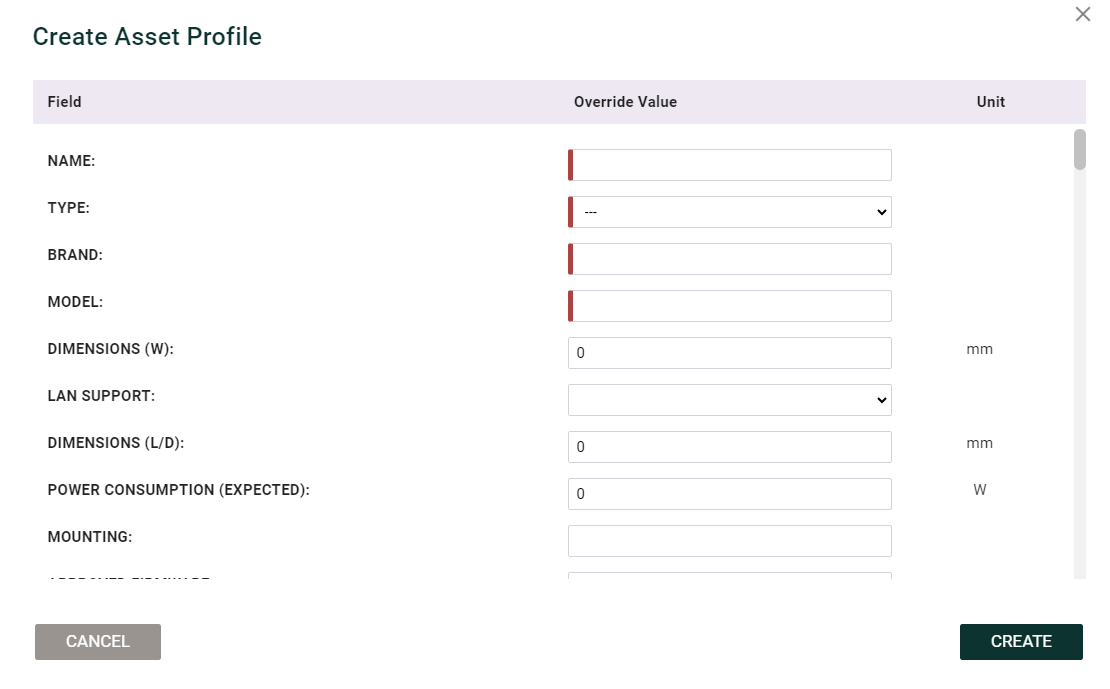
Creating Asset Profiles
To create an asset profile, the following fields are required:
- Name (display name for the profile)
- Type (device category)
- Brand (manufacturer)
- Model (specific model number)
Include as much detail as possible when creating an asset profile. Optional fields can prove very valuable for troubleshooting and data gathering in the future.
Driver Mapping
Drivers determine device availability in Room Manager. A device with a Space VC driver but no Space CE driver will not appear when creating Space CE rooms. Ensure the correct drivers are mapped for each product type the device should support.
Profile Pictures
Users can add profile images to asset profiles through the context menu’s Update Profile Picture option using drag-and-drop upload.
Users and RBAC
Access Control
Navigate to Administration > Users to manage user permissions through Role-Based Access Control (RBAC).
User Groups
User Groups categorise users by organisation, department, or specialisation. Groups are organisational only and do not directly set permissions. The Roles tab handles access control.
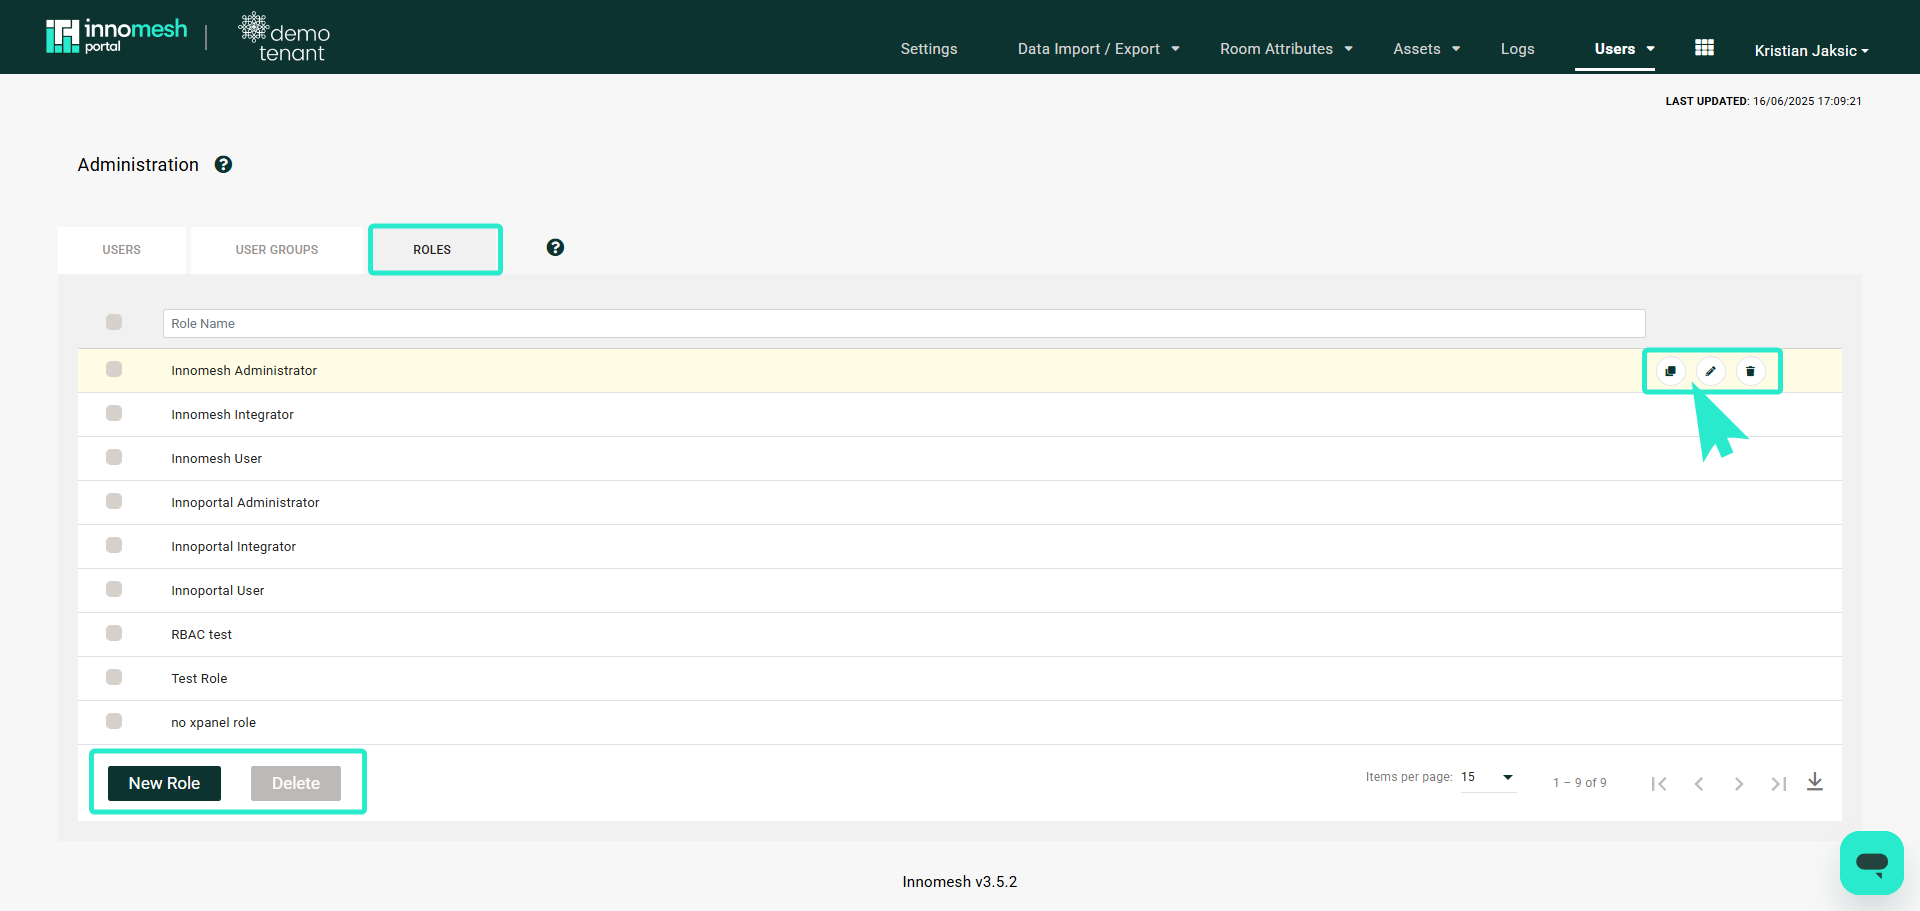
Roles
Roles define how much access a user has into Innomesh Room Manager and Portal. Each role specifies fine-grained permissions across Room Manager and Portal sections, as well as which sites and User Groups’ rooms the user is allowed to access. Roles are enforced on the user the next time they log in.
Each section supports All, View Only, None, or Customised permission levels.
General
| Option | Description |
|---|---|
| User Group Resource Access | Controls which User Group’s rooms this role can access. All grants access to every group’s rooms; Own User Group restricts access to rooms within the user’s own group; Custom lets you select specific user groups |
| Site Access | Determines which sites this role can access. Can be set to All or Custom (returns an array of sites). Note: Vitals and Insights dashboards do not support site filtering at this time |
| Live Chat Access | Toggles access to live chat support (Yes or No) |
Room Manager Permissions
| Area | Fine-grained permissions |
|---|---|
| Administration | Access administration, view zones, rotate hosts, view host logs, view hosts, manage hosts |
| Rooms | View rooms, create and delete rooms, edit room information, edit room configuration, edit third-party room configurations, create and delete third-party rooms, launch remote UI panel, expose all room options |
| Templates | View templates, create and delete templates, edit template configuration, edit template room options, edit information template association, edit third-party template configurations, create and delete third-party templates |
Portal Permissions
| Area | Fine-grained permissions |
|---|---|
| Hotlist | View Hotlist, view Low/Medium/High/Critical/Notice/Suppressed severity alerts, claim alerts, manage alerts |
| Vitals Dashboard | View Custom, Compliance, Network, Infrastructure, Pulse, VNOC, and Rooms dashboards |
| Room Management | View rooms, manage rooms |
| Room Information | View room information, edit room information |
| Insights Dashboard | View Proactive Support, Consumption, Alerts, Rooms, Custom, and Usage dashboards |
| Asset Management | View assets, perform asset operations, manage assets |
| Integrations Management | View integrations, perform integrations operations, manage integrations |
| Administration | Access administration, user administration access, role administration access, view logs, manage assets and asset profiles, trigger Change Mode |
For detailed RBAC configuration instructions, refer to the RBAC Authorisation Guide.
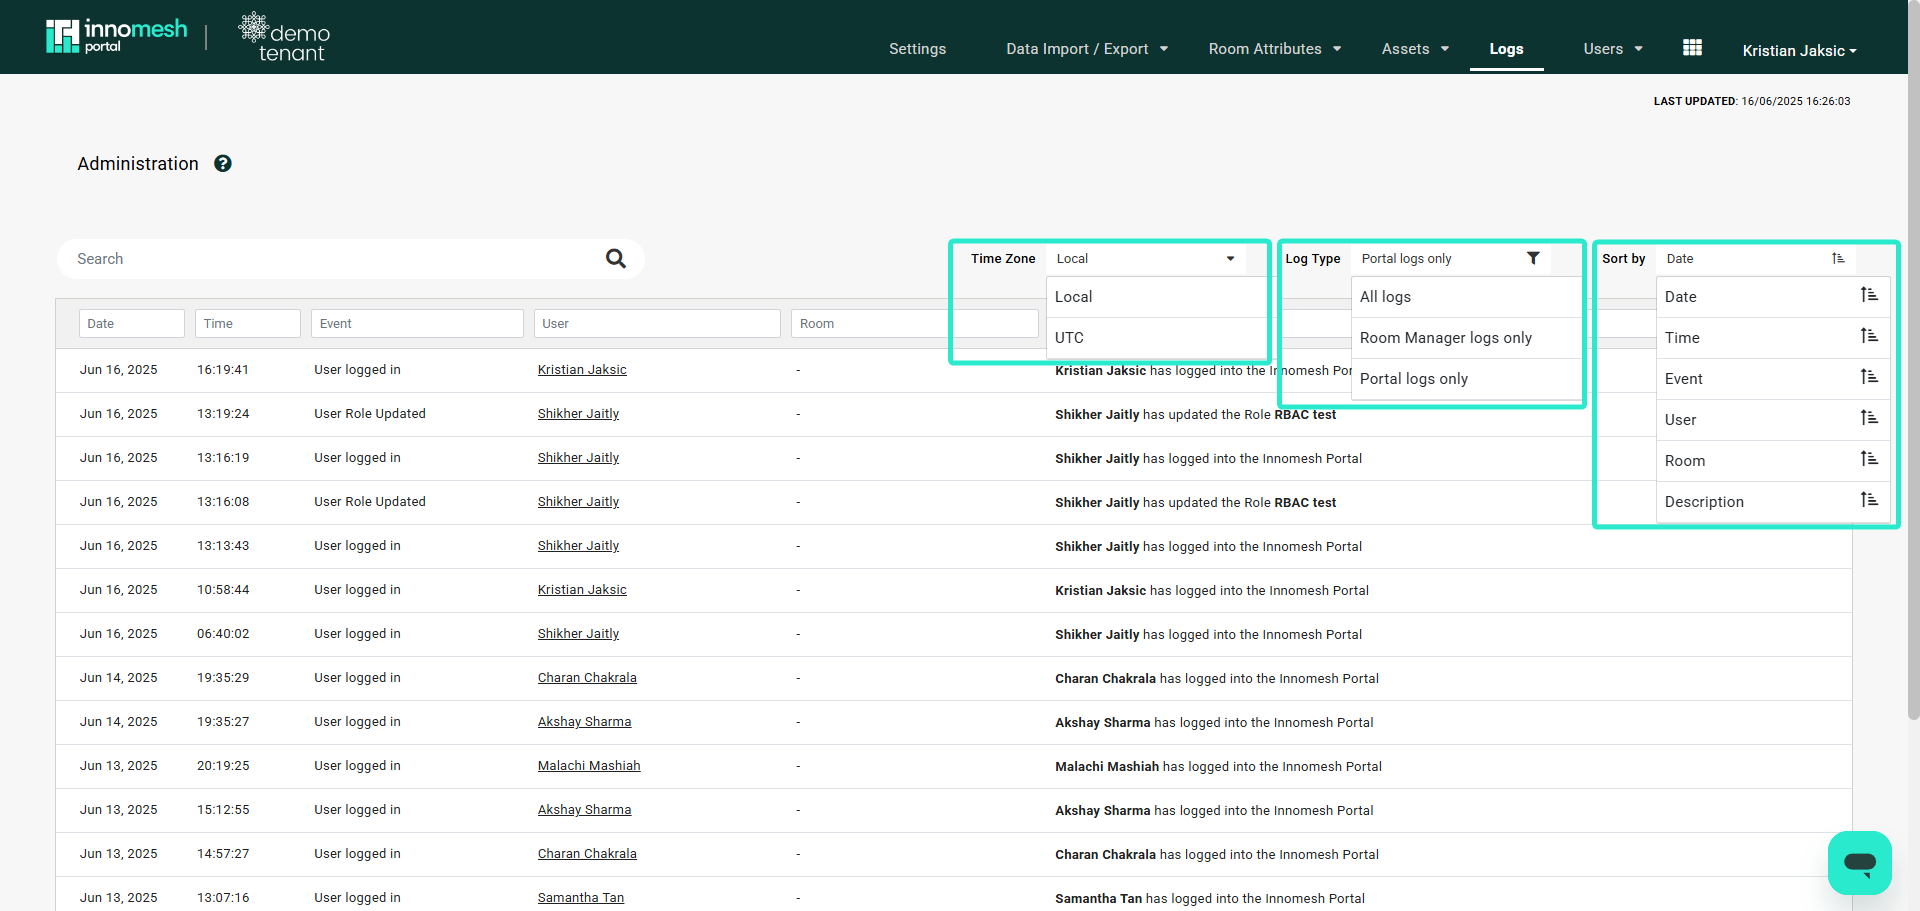
Logs
The Logs page provides a detailed activity history with sortable columns and filters. It tracks user actions including logins, edits, asset interactions, room operations, and administrative changes.