Innomesh integrates with Microsoft Teams Rooms (MTR), enabling users to connect MTR devices to the platform for real time monitoring and data collection. The system presents device information, health status, and activity metrics in an organised interface.
Key Features
Device Management
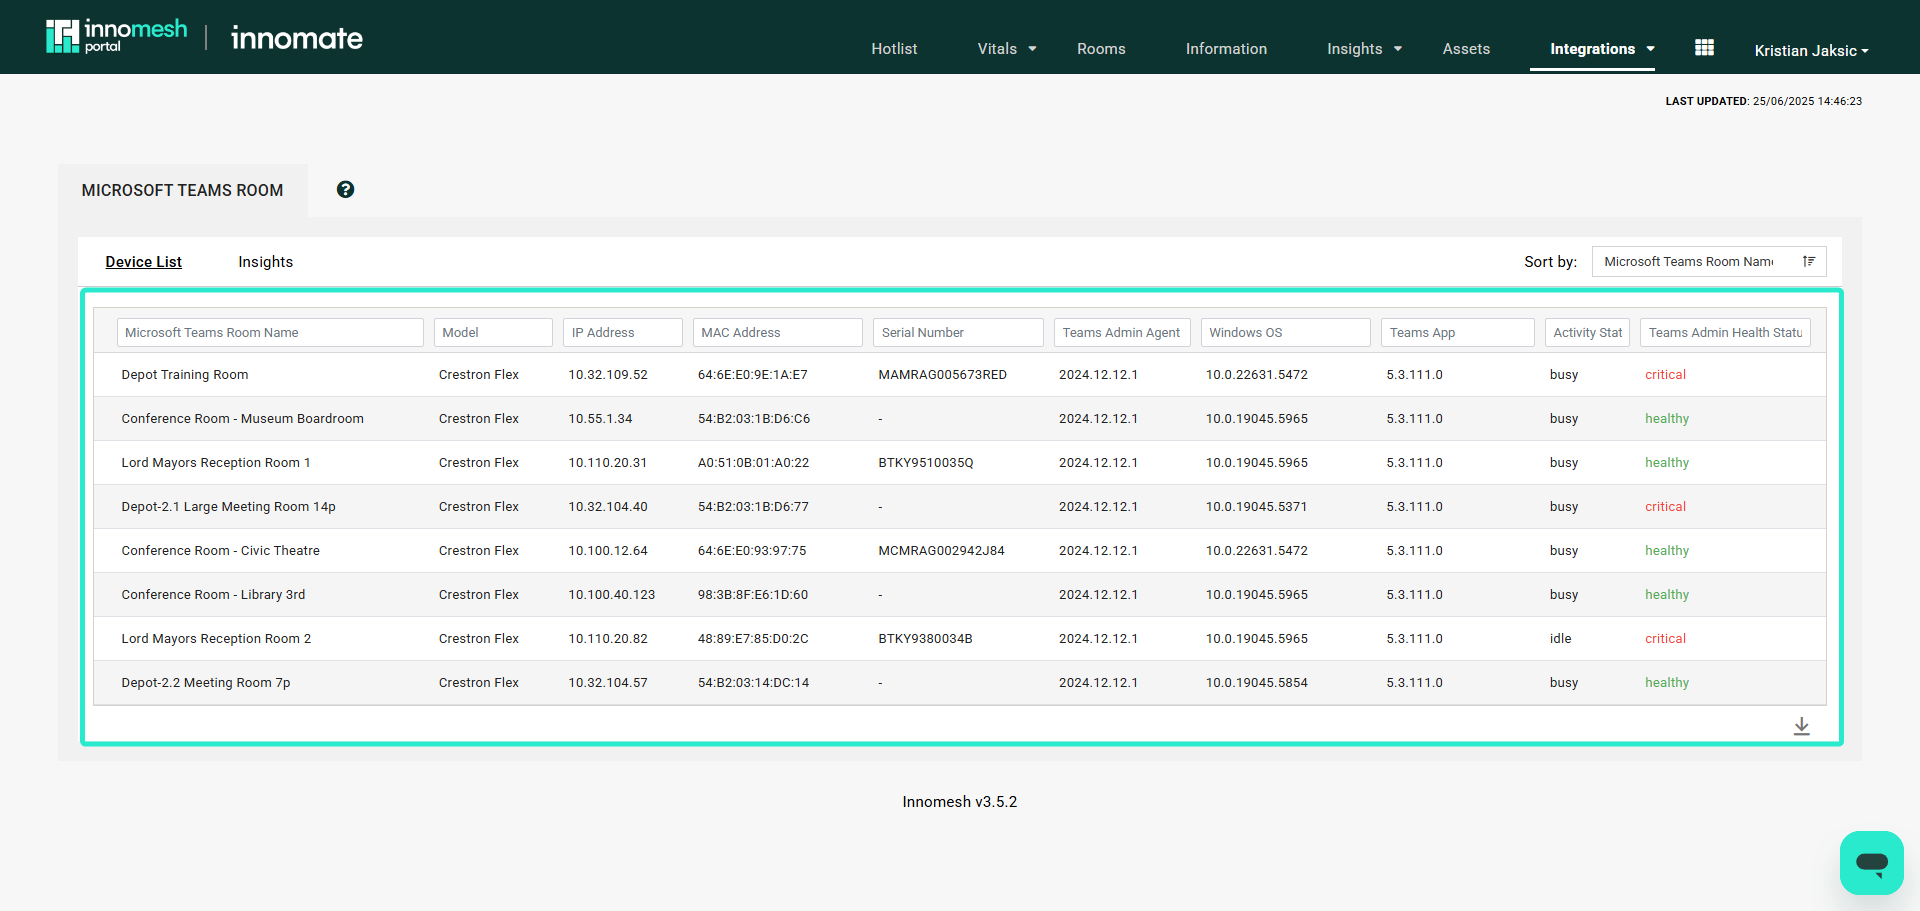
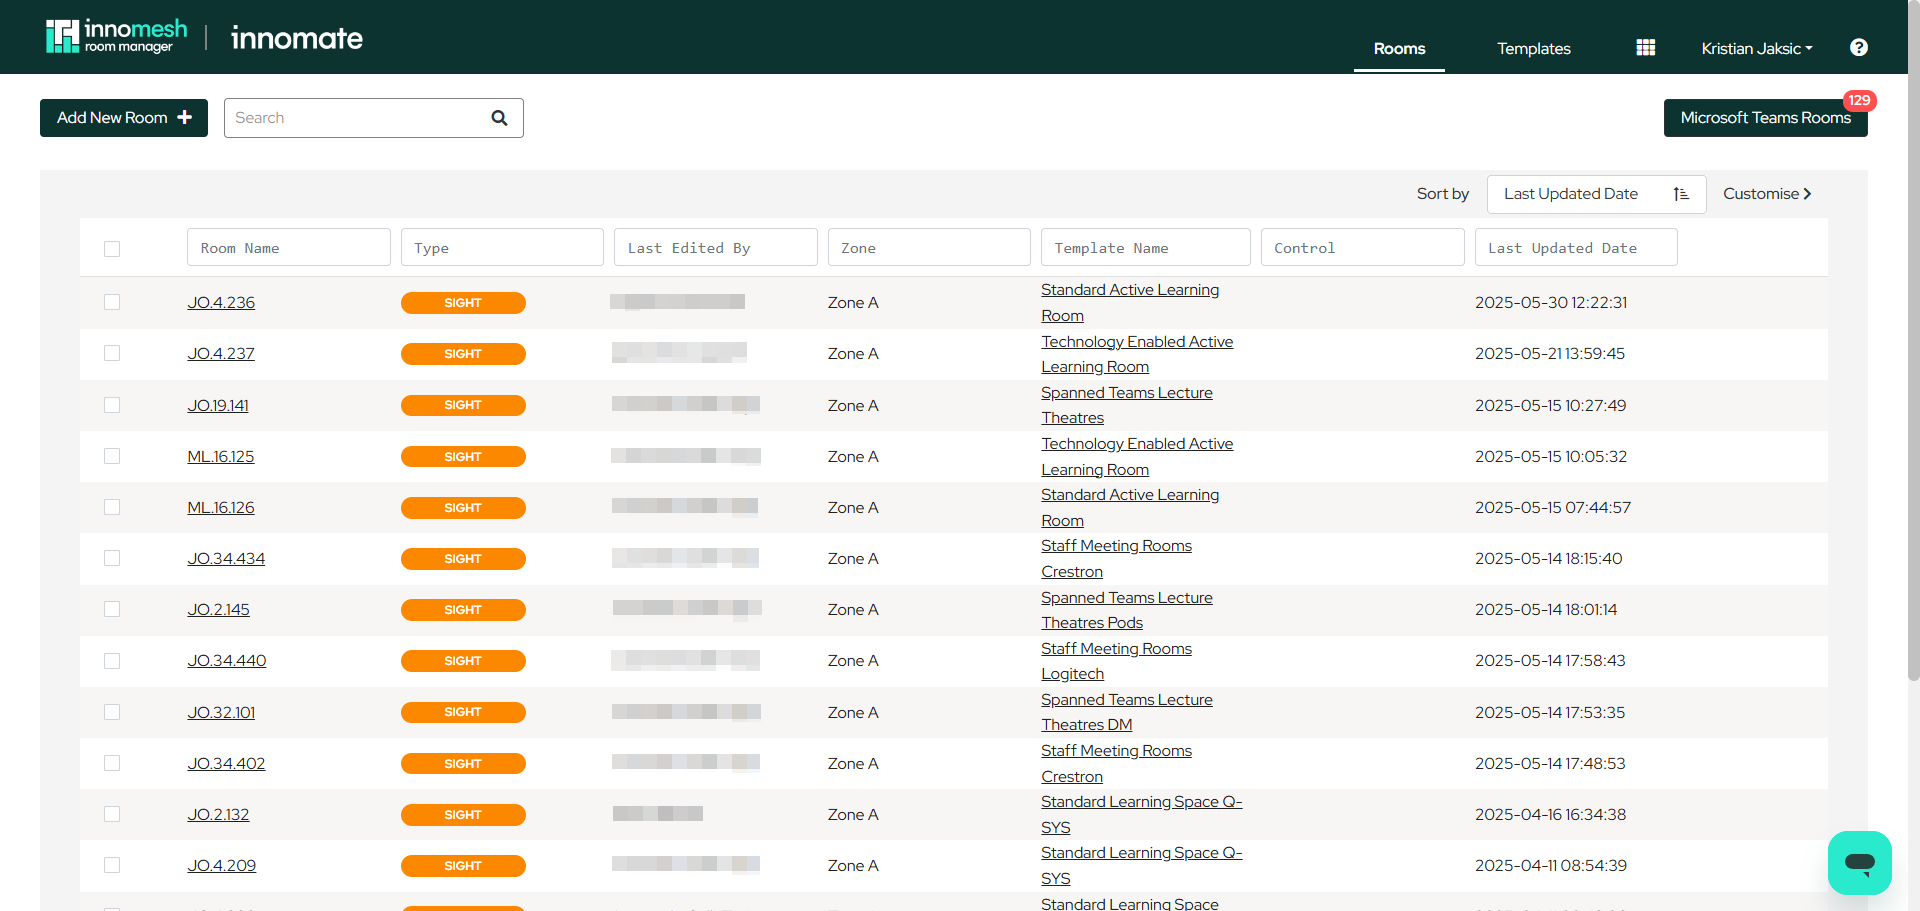
Users can view all associated MTRs in a searchable table format, with access to individual device details through an Asset Page after clicking on a specific room.
Insights Dashboard
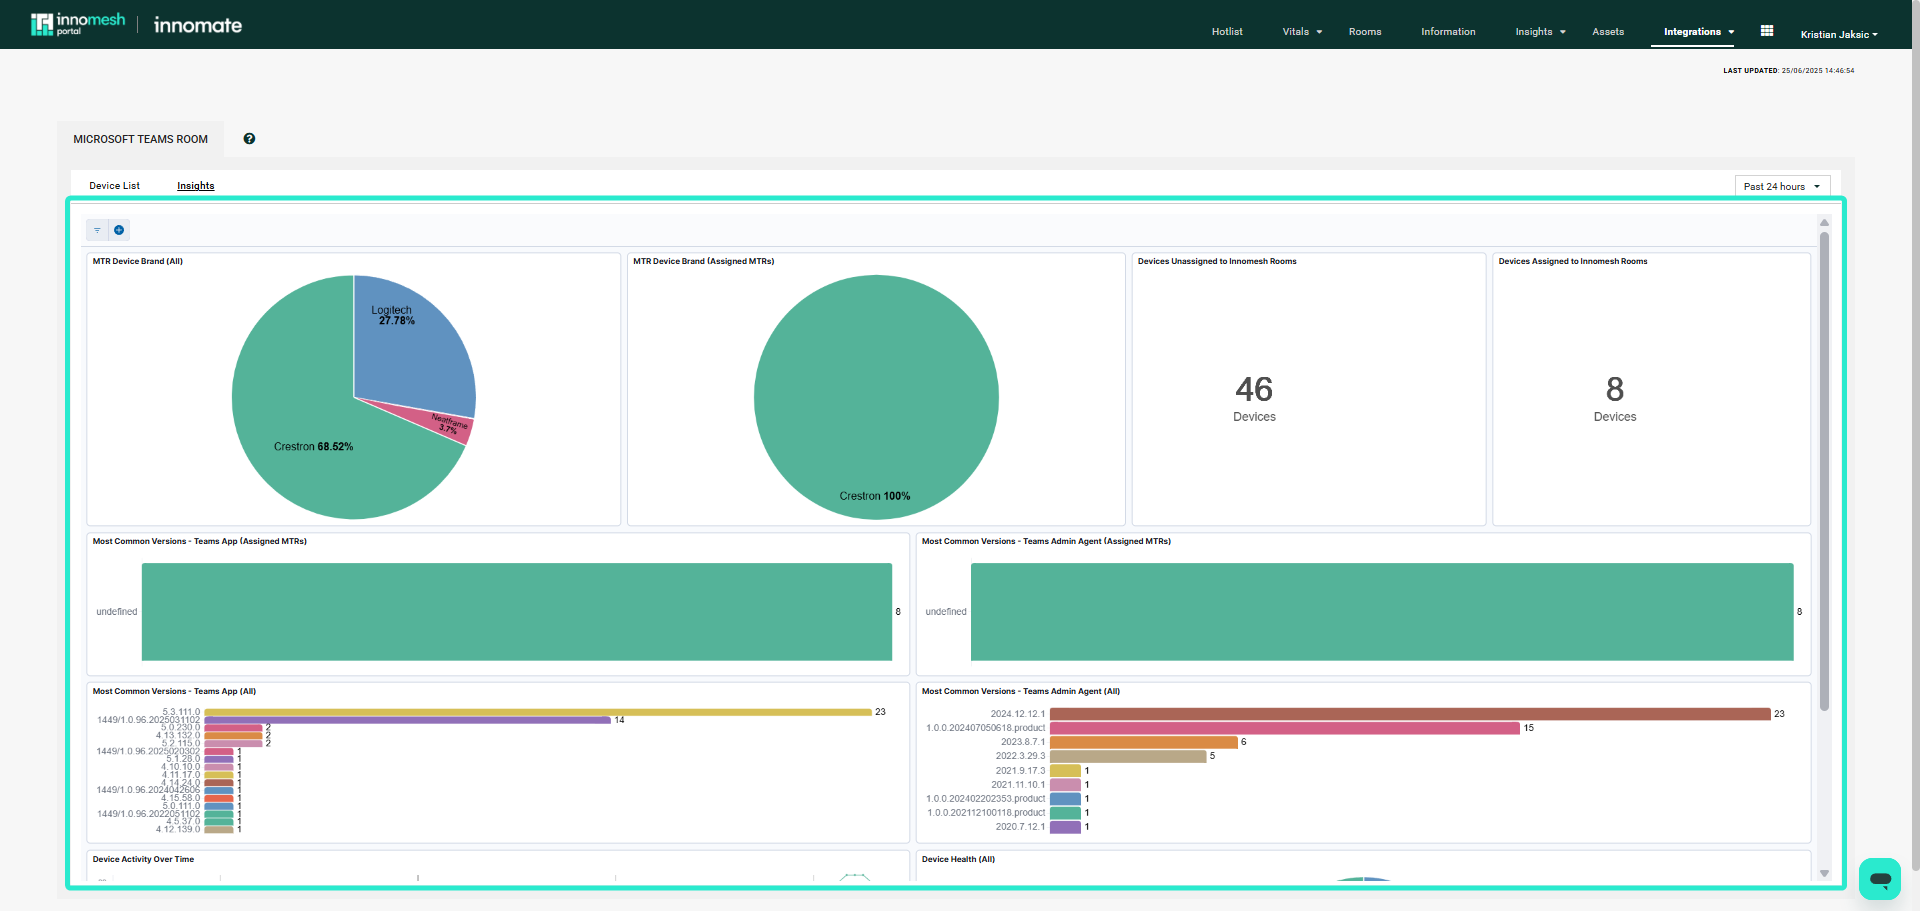
The system provides visualised performance data and usage trends for the MTR device fleet in graph format.
Configuration Interface
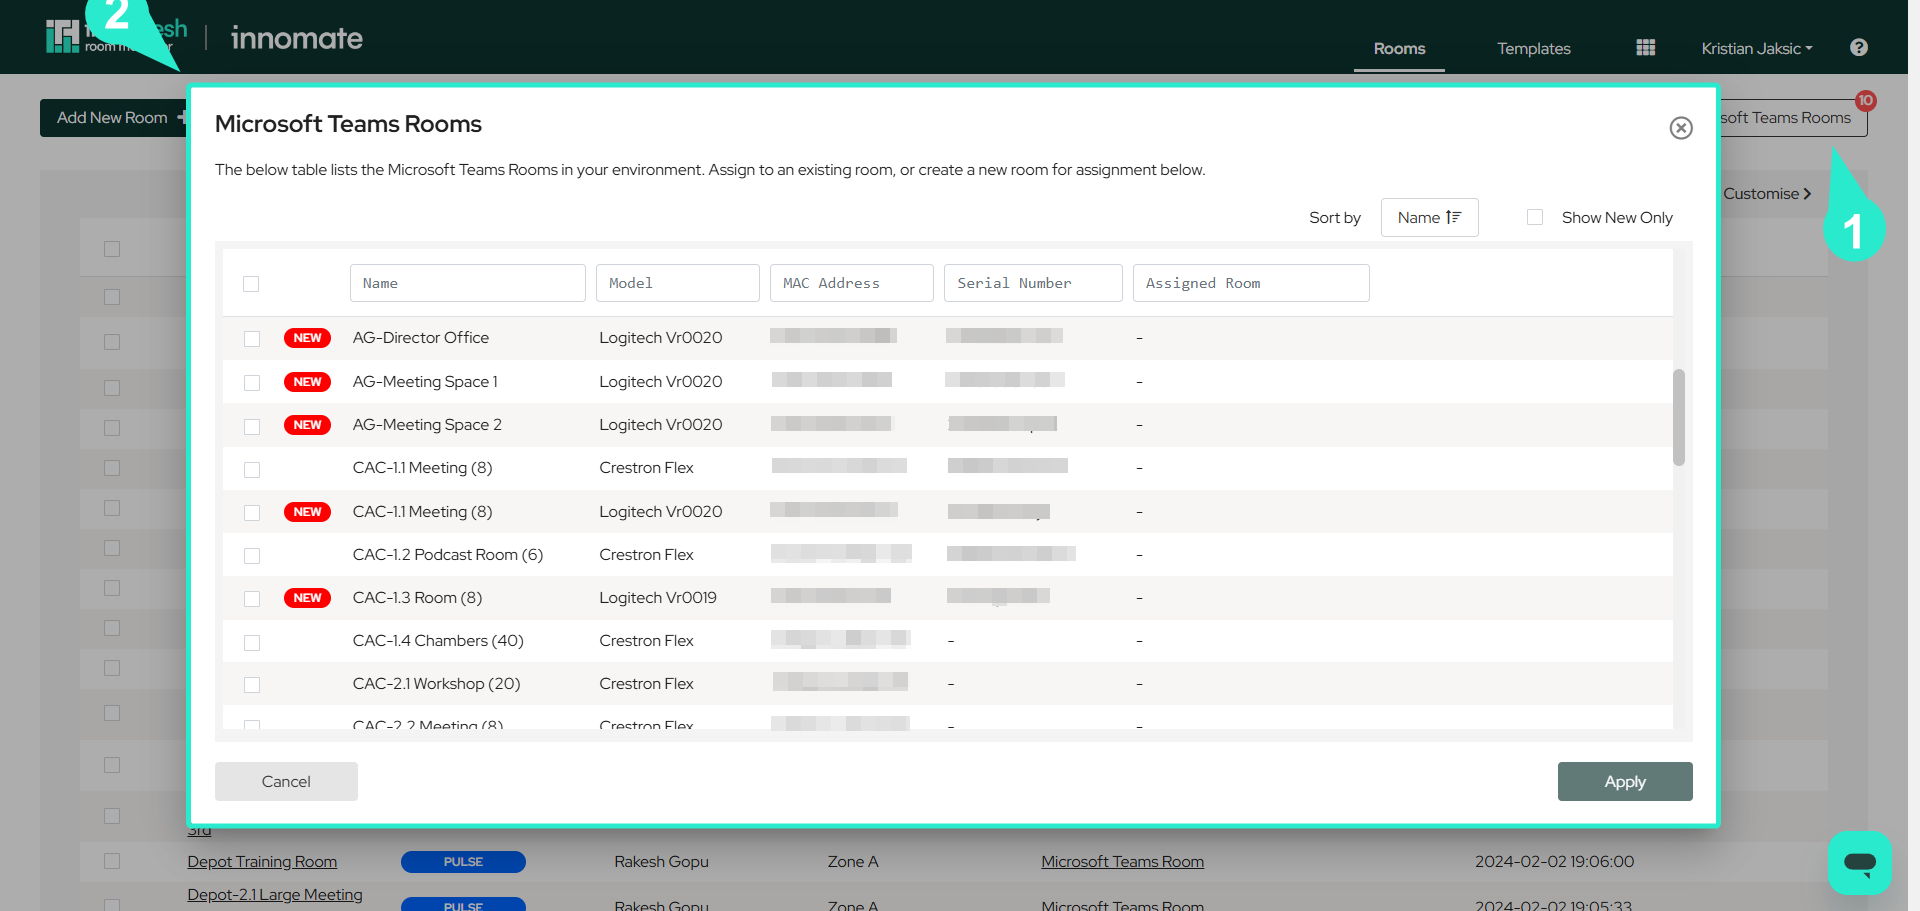
A dedicated management UI in Room Manager allows users to search MTR devices across multiple columns, making filtering and discovery easier. Users can associate MTRs with existing rooms or create new ones directly from this interface.
Deployment Methods
Two primary approaches are available for setting up Microsoft Teams Rooms.
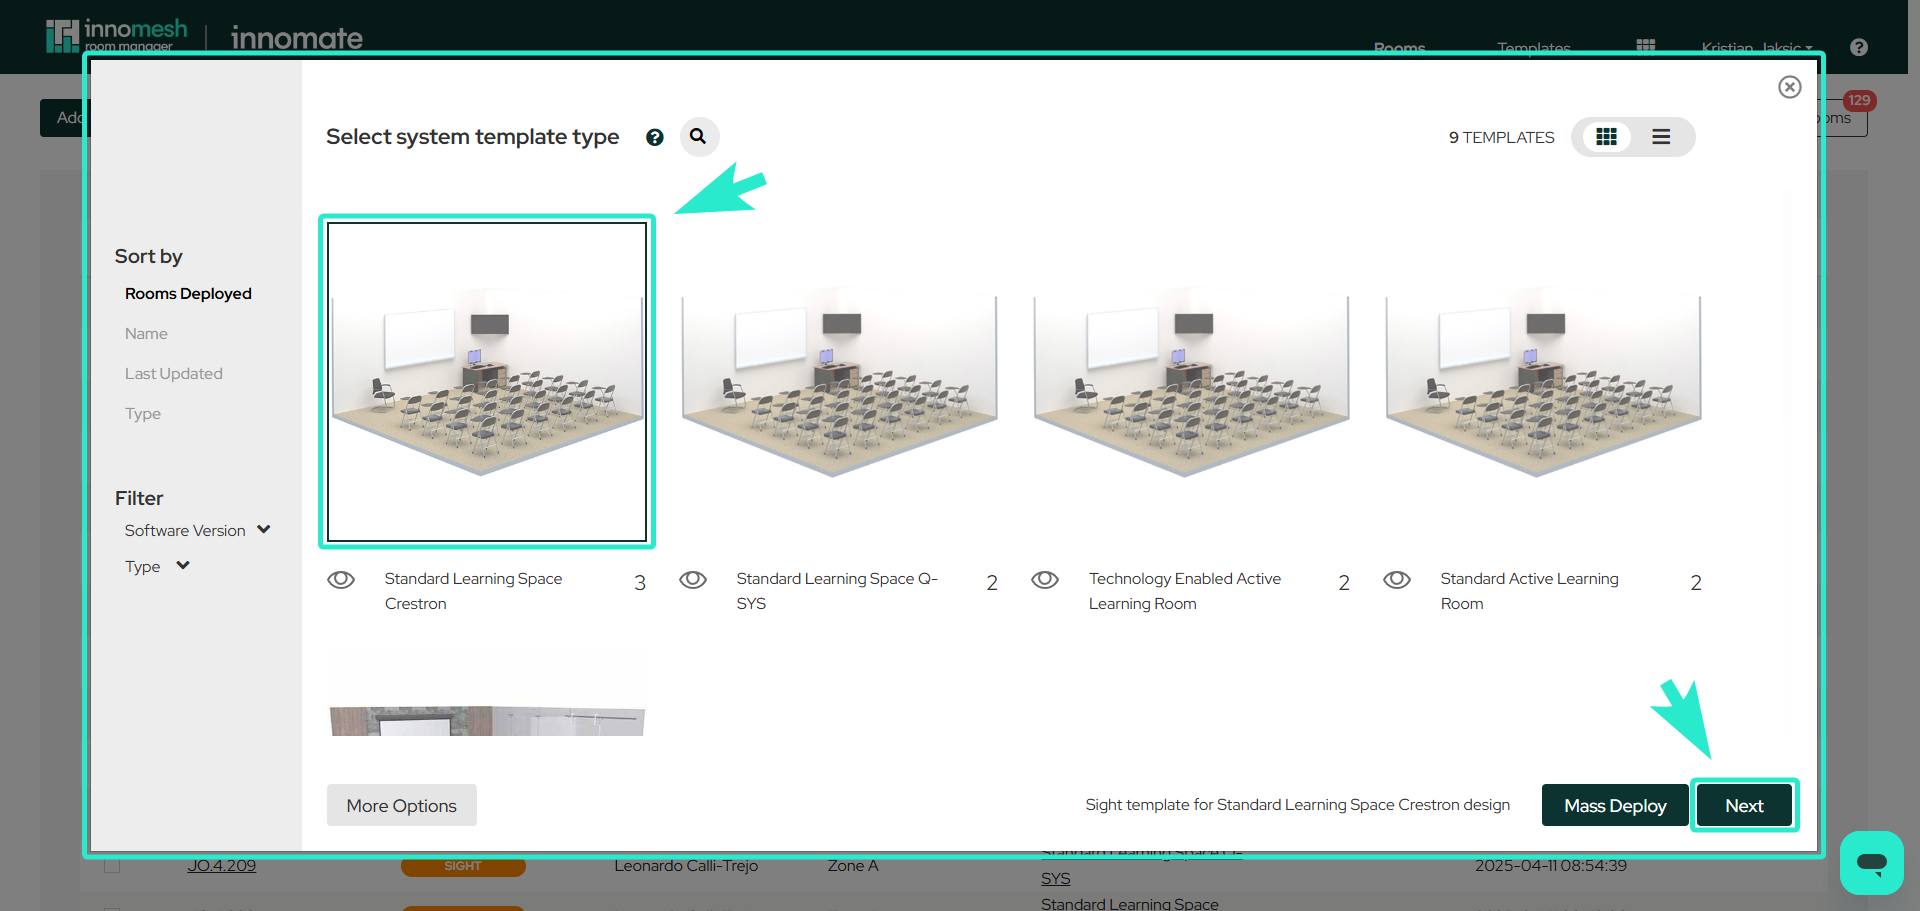
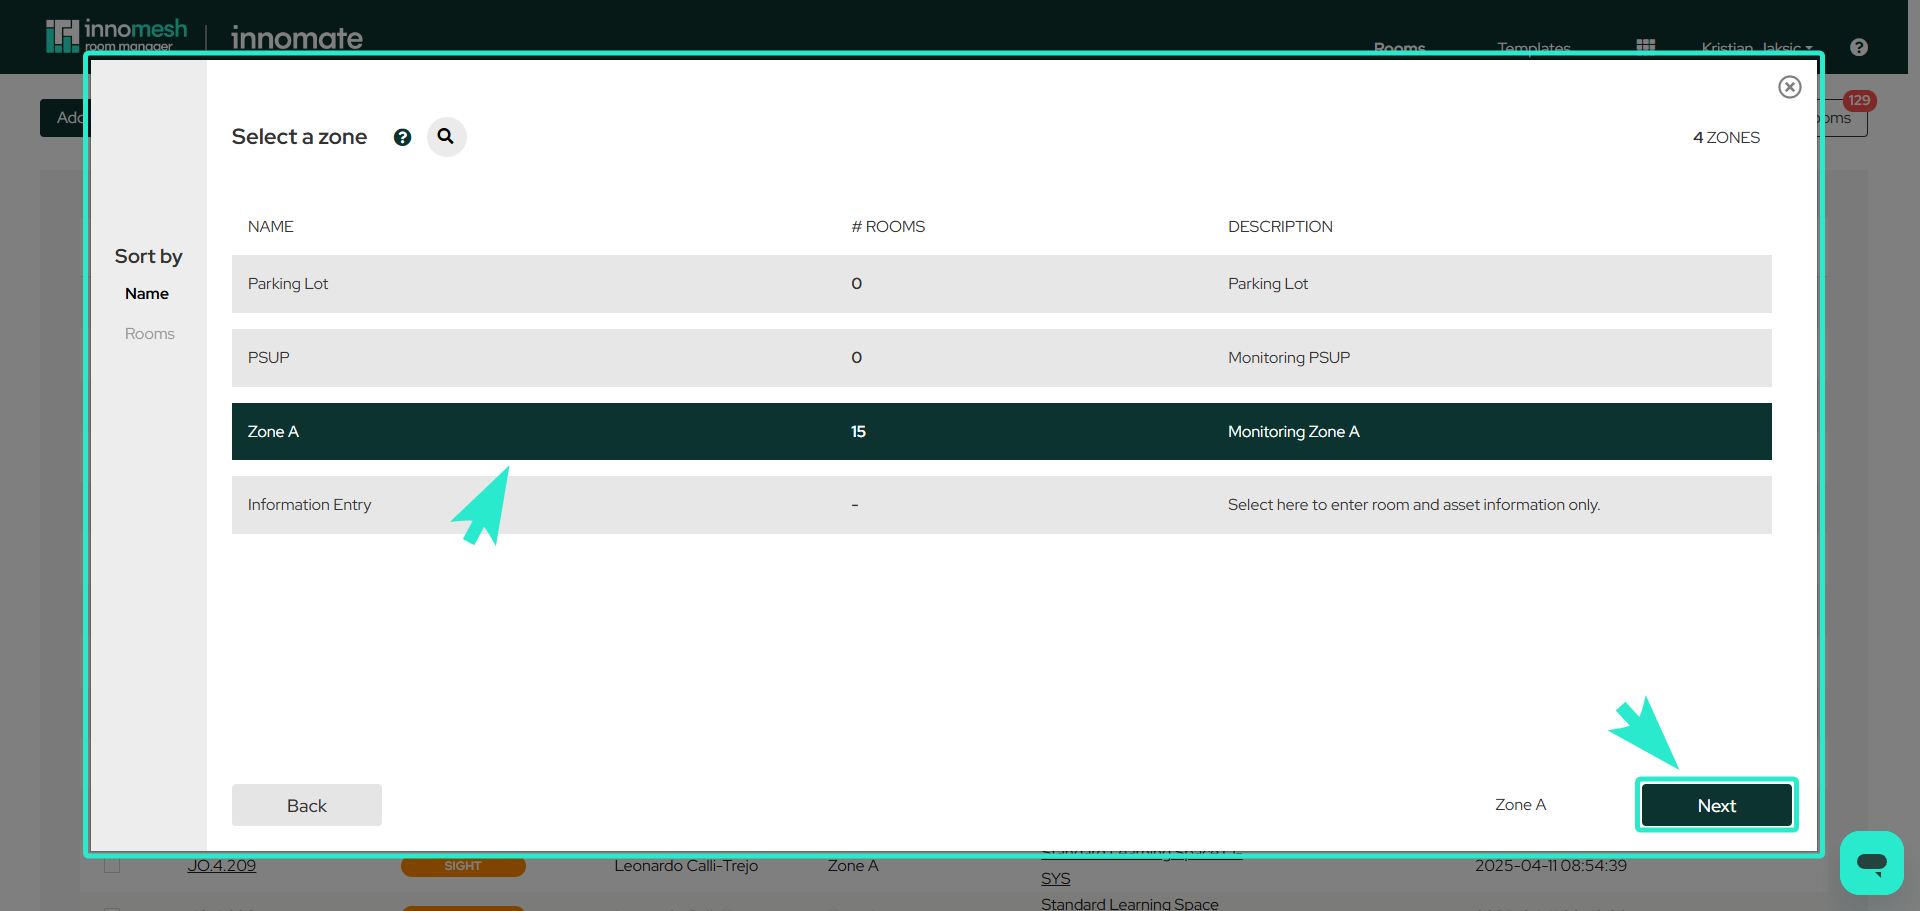
Option 1: Template Based
- Select a system template.
- Choose a zone.
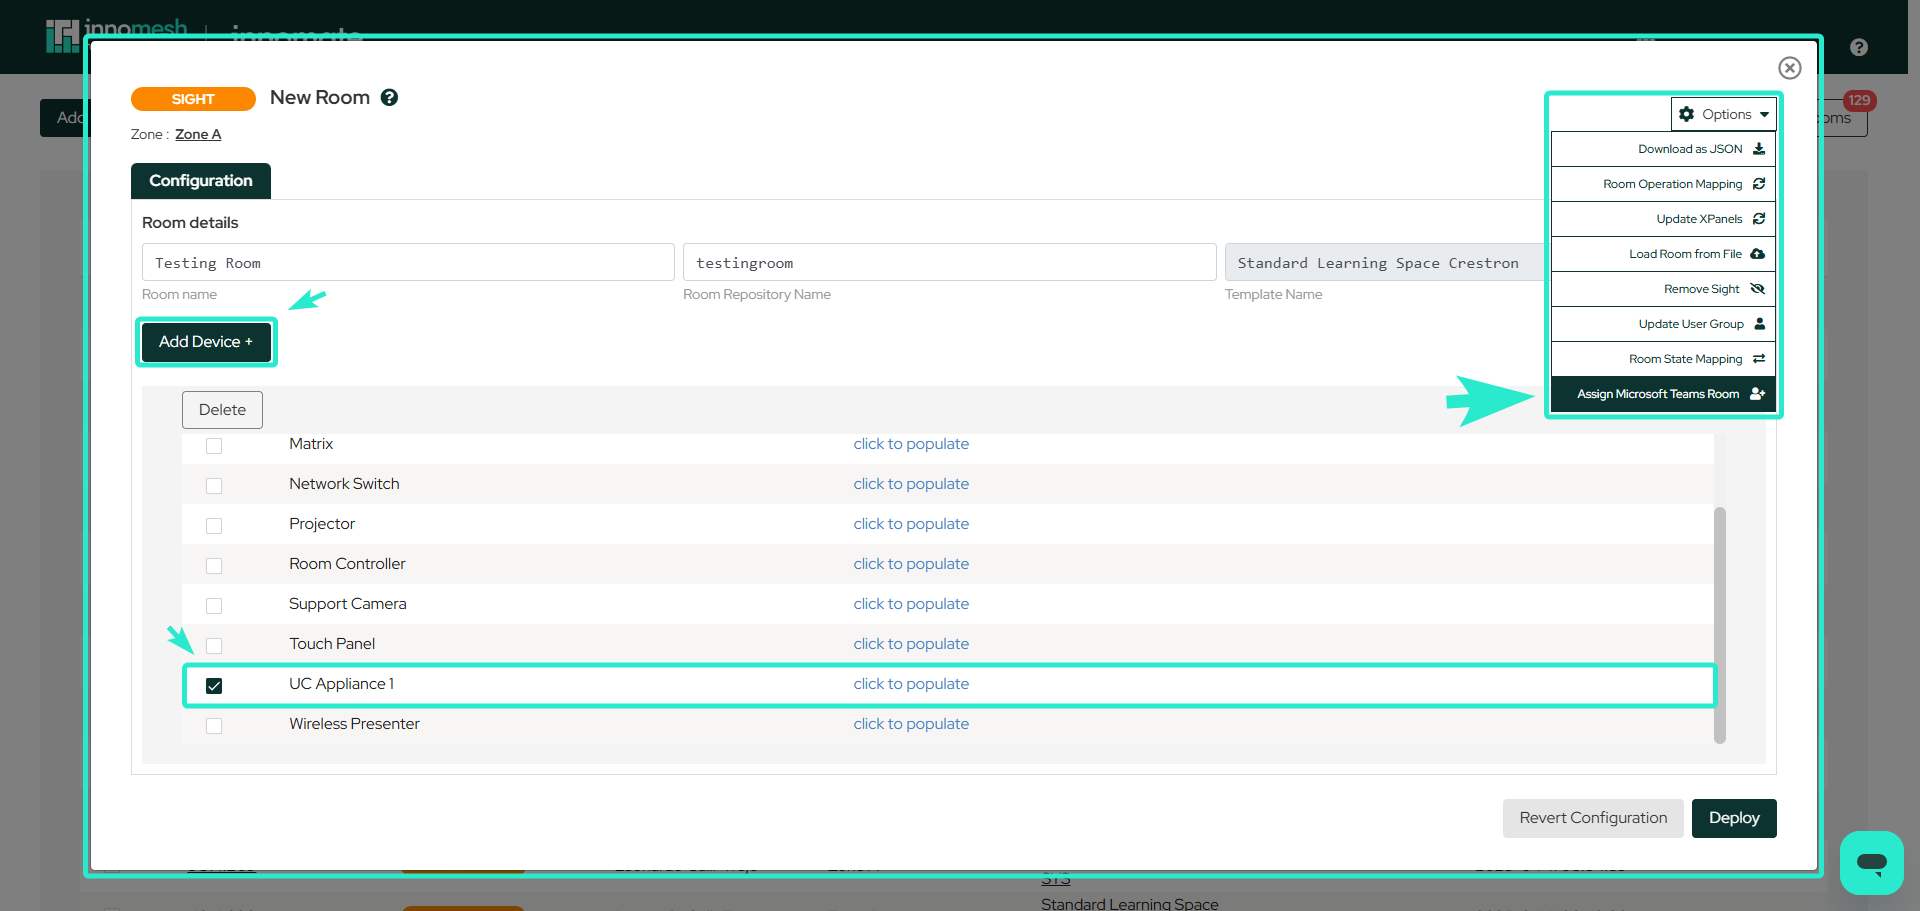
- Add an appliance device to the room.
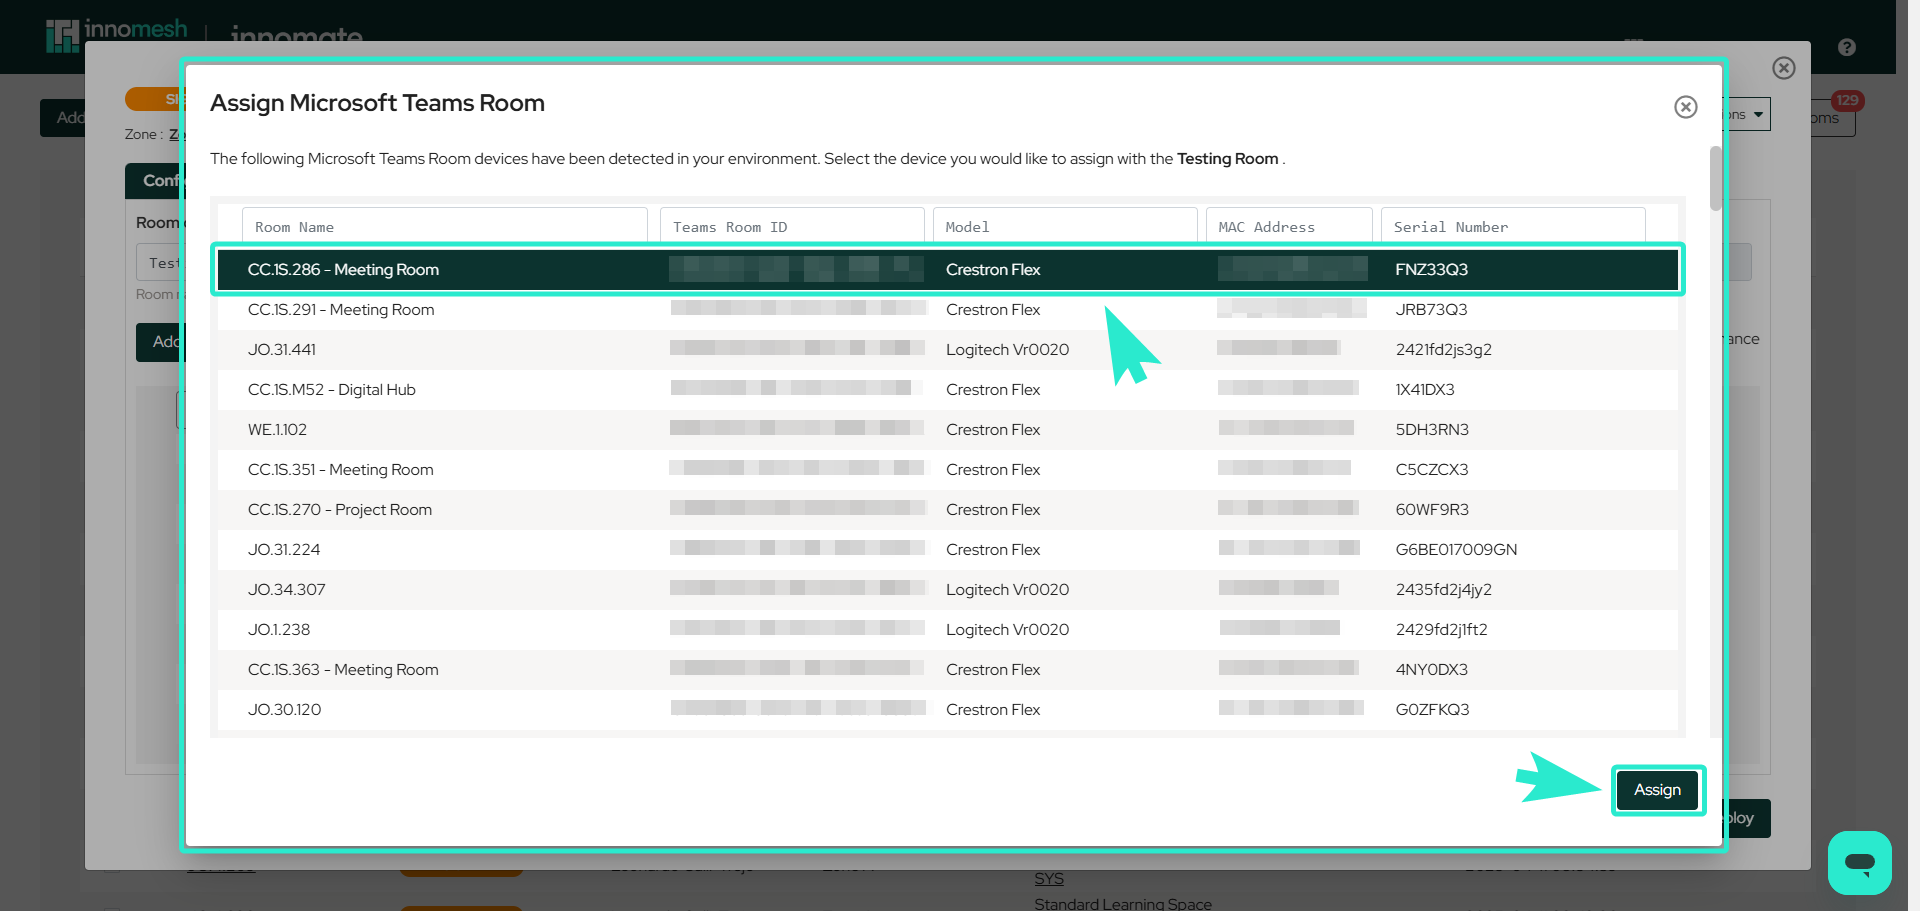
- Assign the MTR. After the appliance device is added, an Assign Microsoft Teams Rooms option becomes available in the Options menu as a dropdown. Selecting this opens a table of all detected MTR devices — choose the target device and click Assign.
Option 2: Direct Device Assignment
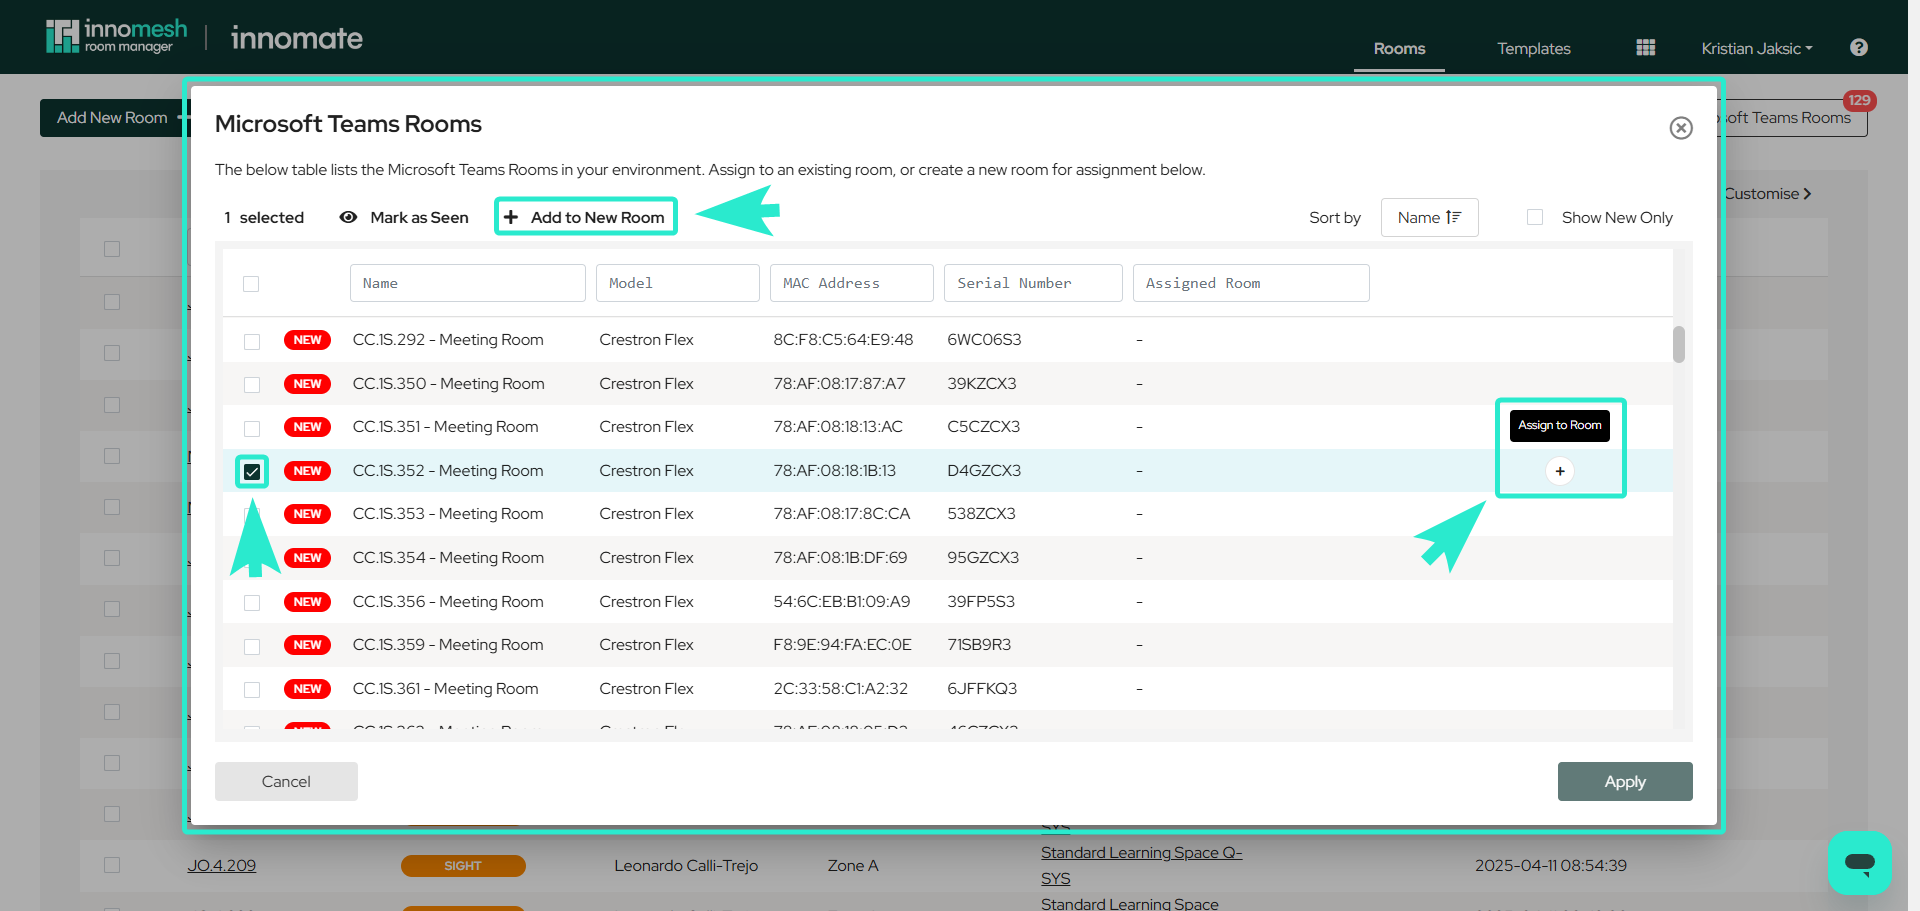
Clicking Microsoft Teams Rooms opens a table of MTR devices and rooms, giving direct access for assigning devices, selecting rooms, or adding a device to a new room.
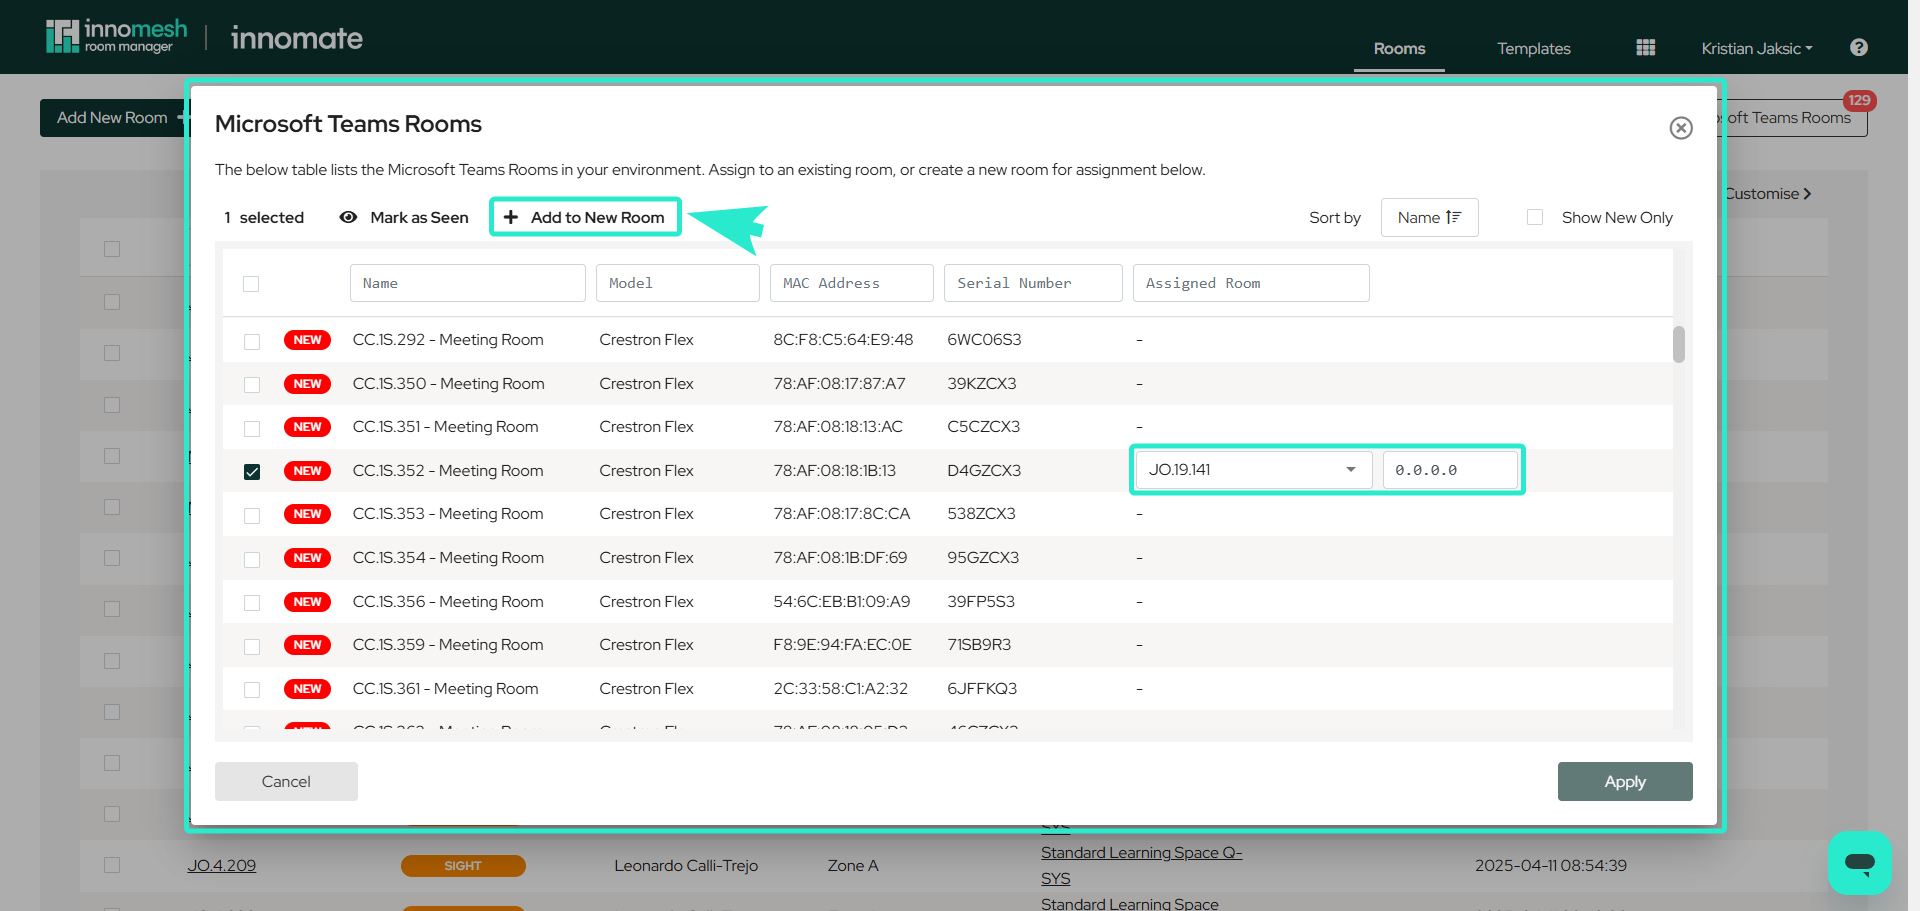
Assign Room: Clicking Assign Room opens two fields:
- Assigned Room — select the target room to link the MTR to.
- Click to Populate — enter the device’s IP address.

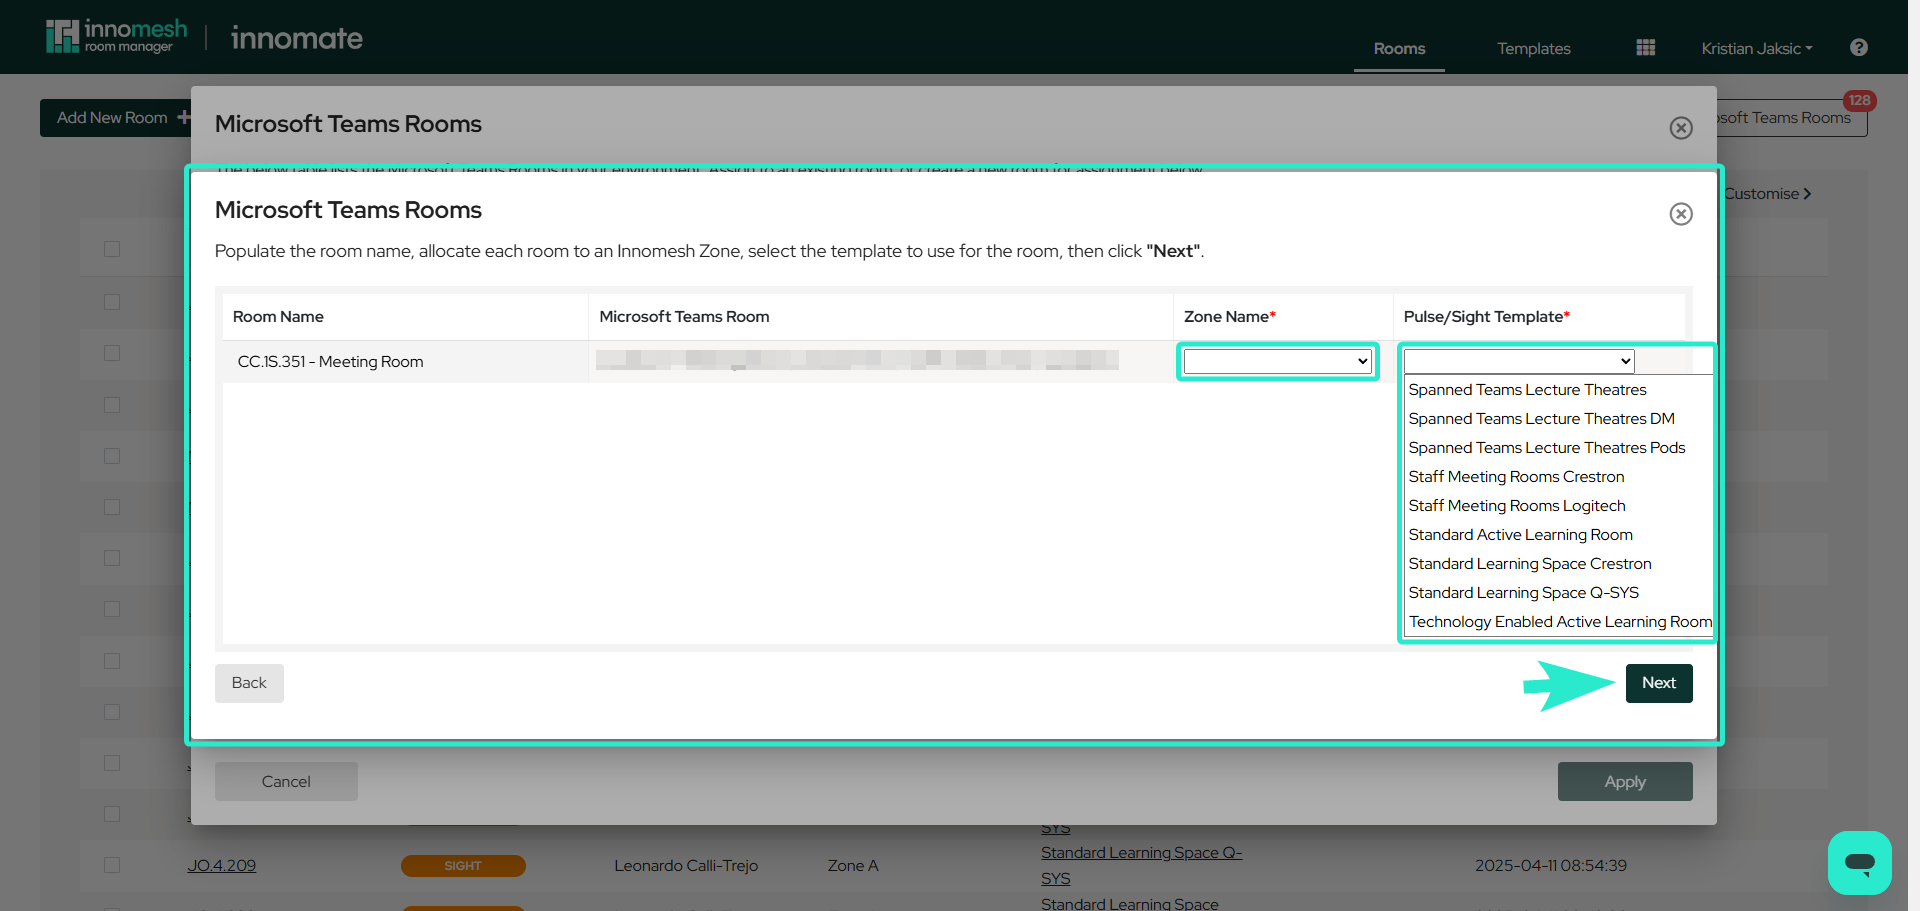
Add to New Room: Choose a room and device to create and assign it in a new room. In this flow, the Zone Name and Pulse/Sight Template fields appear in the room setup bar, letting you specify the room’s zone and template before continuing.
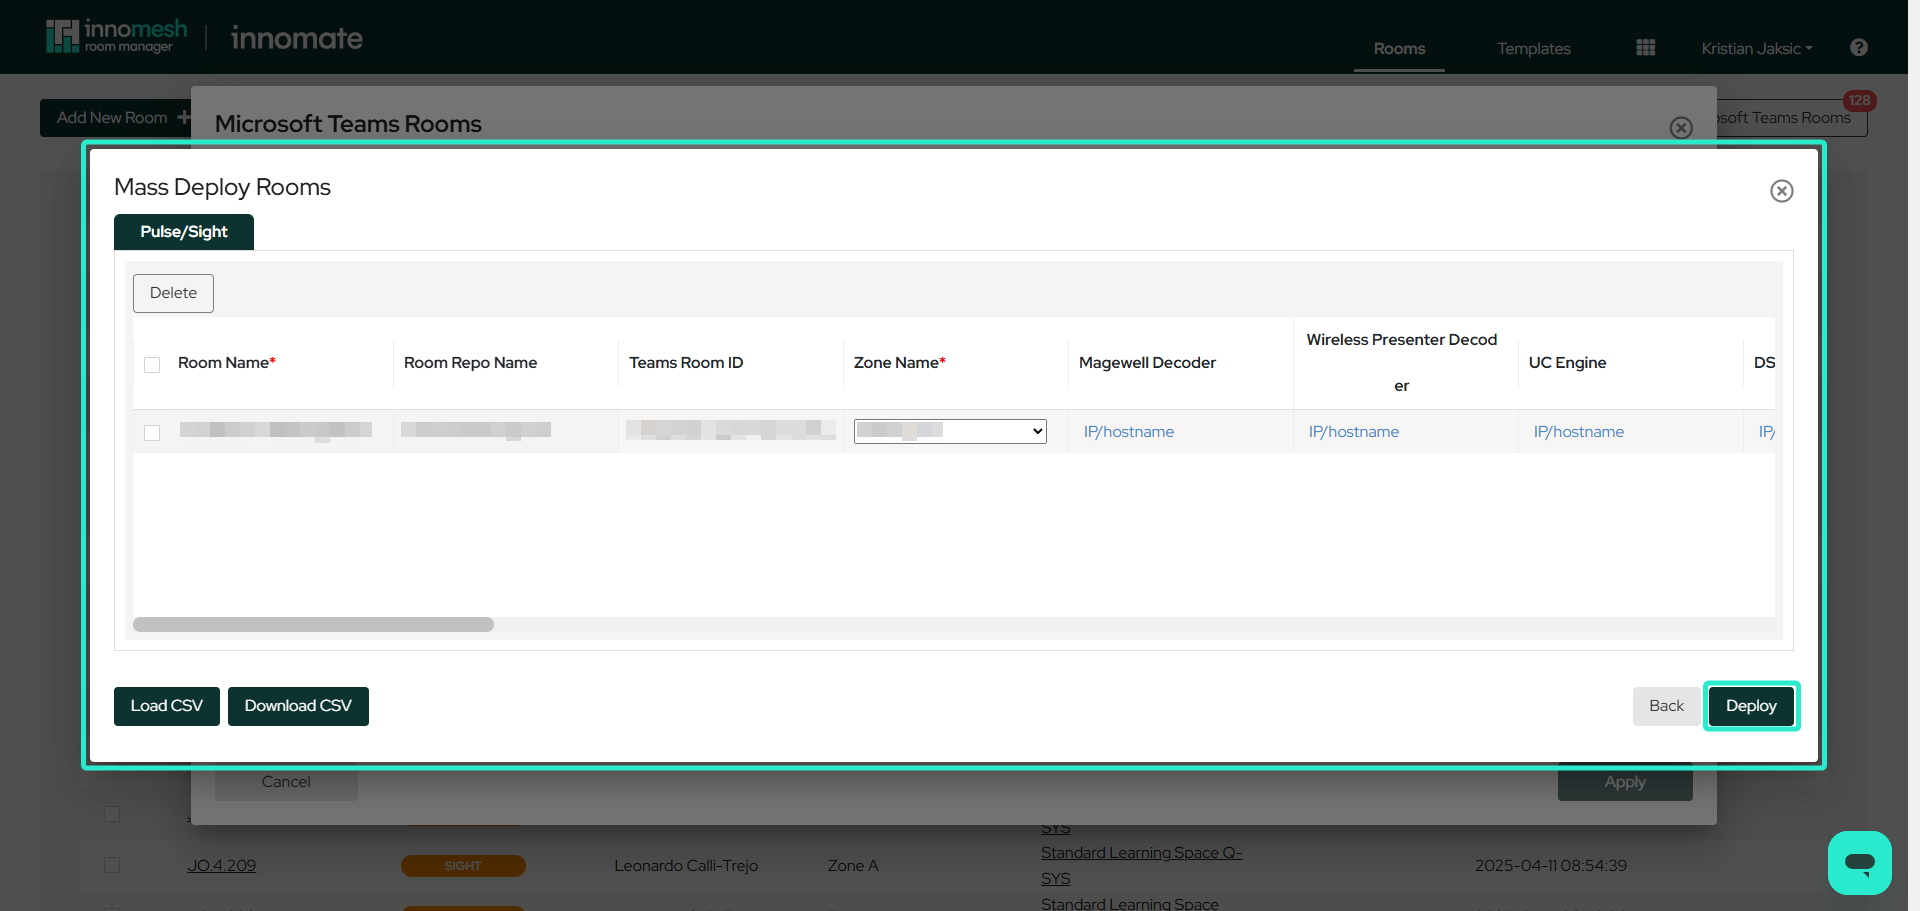
Mass Deploy Rooms: Displays a list of selected MTR rooms with their details and fields to input additional configuration. Use Load CSV and Download CSV to bulk manage MTR setups, then click Deploy to finalise.
Both methods conclude with a deployment step that confirms the configuration and adds the room to Room Manager.